Running Deepseek models locally on Windows allows you to harness the power of AI without relying on cloud services. Whether you're an AI enthusiast, researcher, or developer, setting up Deepseek on Windows can provide faster inference, more control, and cost savings. But before diving in, you'll need the right system setup and dependencies.
This guide will walk you through everything—from installing Deepseek on Windows to optimizing it for better performance. Whether you have a powerful GPU for acceleration or just a CPU-based system, we’ll cover the best ways to run Deepseek locally with ease.
What is DeepSeek?
DeepSeek is an innovative AI model that has gained significant attention in the tech community. Developed by a Chinese team, it has been designed to perform complex reasoning tasks and is often compared to leading models like ChatGPT. With its advanced capabilities, DeepSeek aims to provide users with a powerful tool for various applications, from creative writing to problem-solving.
What are DeepSeek Models?
DeepSeek models are sophisticated AI systems that utilize deep learning techniques to analyze and generate human-like text. These models are capable of understanding context and delivering coherent responses, making them suitable for a wide range of tasks. The latest version, DeepSeek R1, has been particularly noted for its performance in reasoning and coding tasks, providing users with an enhanced experience compared to traditional models.
Why Run DeepSeek Locally Instead of Using Cloud Services?
Running DeepSeek locally offers several advantages over cloud services. First, it enhances privacy by keeping your data on your machine rather than sending it to external servers. This is especially important for sensitive information or proprietary content. Additionally, local execution can reduce latency, allowing for faster interactions with the model. Lastly, running DeepSeek locally can save costs associated with cloud service subscriptions, making it a more economical option for many users.
System Requirements for Running DeepSeek Models on Windows
Hardware Requirements
Before you start running DeepSeek locally on your Windows machine, it's essential to ensure that your system meets the necessary requirements. Here’s what you need:
- Operating System: Windows 10 or later.
- Memory: At least 8GB of RAM is recommended for optimal performance.
- Storage: A minimum of 5GB of free disk space for the model files.
- Processor: A multi-core CPU; a GPU is beneficial for faster processing but not mandatory.
Recommended Software Dependencies
Once your hardware is set up, you'll need to install the appropriate software dependencies to run DeepSeek effectively:
- CUDA Toolkit: This is essential for GPU acceleration. Make sure to download the version compatible with your GPU.
- Deep Learning Libraries: Install libraries like TensorFlow or PyTorch, as these are commonly used for running deep learning models. Ensure you have the latest versions that support your hardware.
- Python: Having Python (version 3.8 or higher) installed is crucial for running scripts and managing model interactions.
Installation Methods for DeepSeek on Windows
If you’re looking for another way to run DeepSeek models locally on your Windows machine, using Ollama is a fantastic option. Ollama simplifies the process of deploying AI models, making it accessible even for those who may not be tech-savvy. Let’s walk through the steps to get DeepSeek up and running with Ollama.
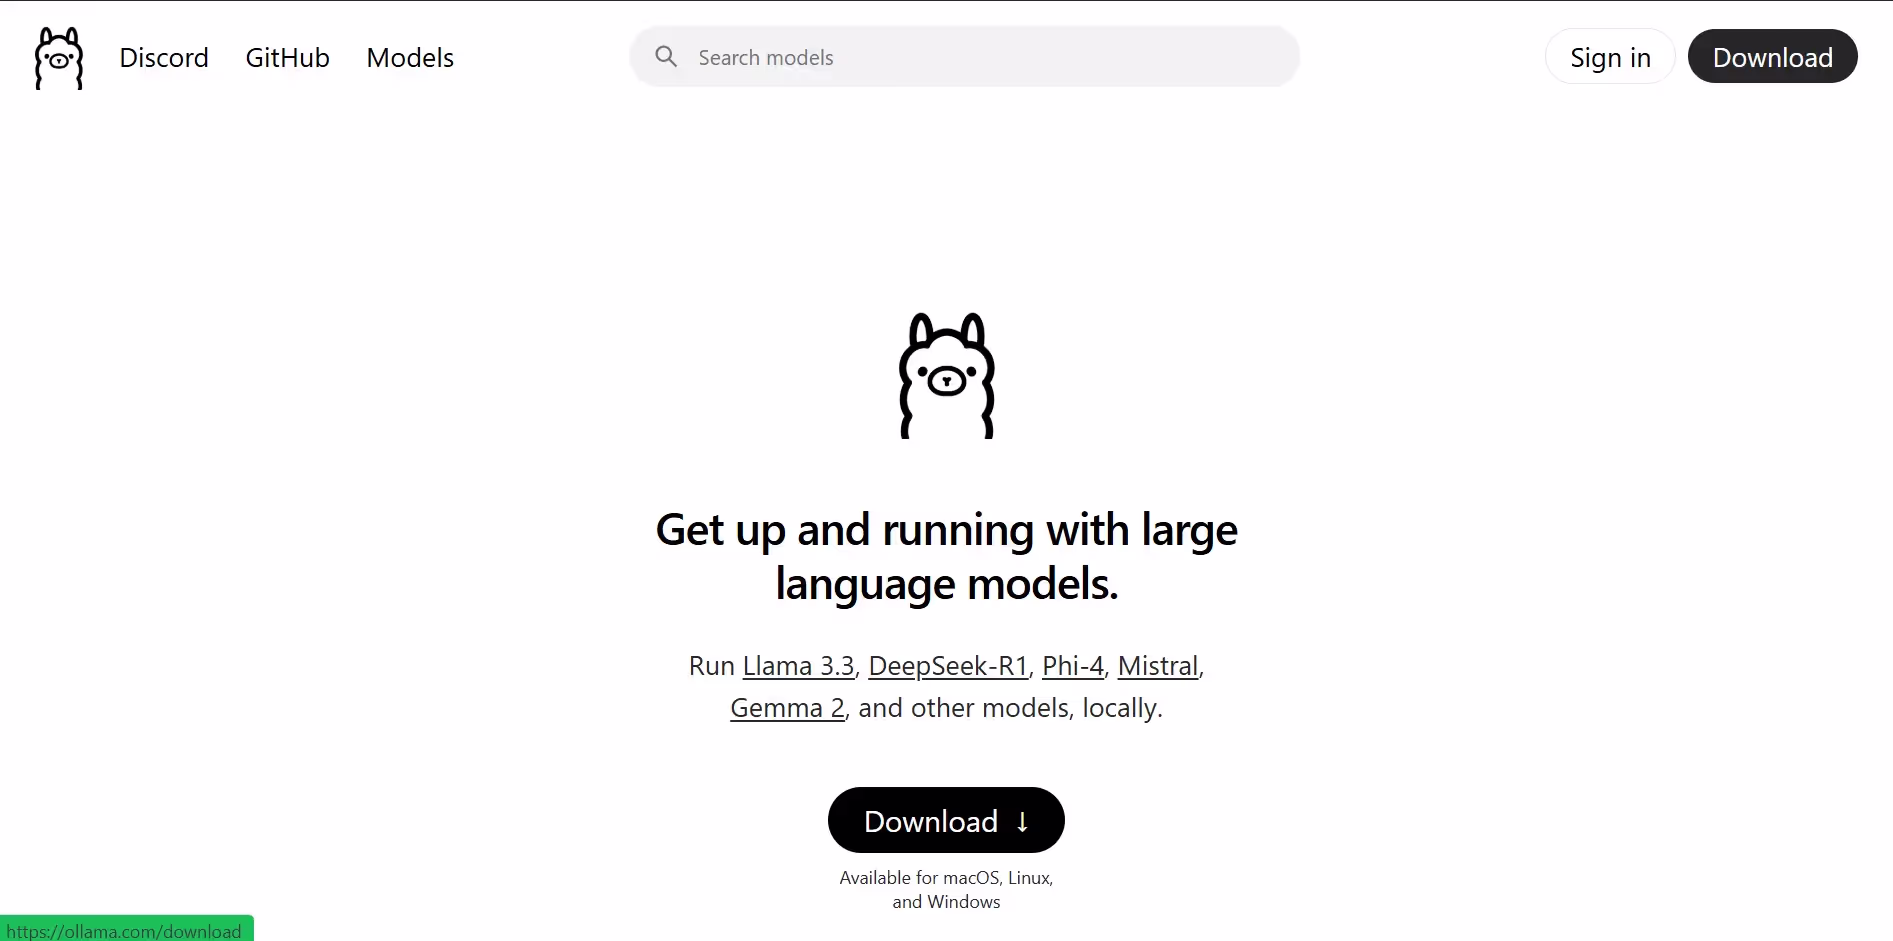
Step 1: Download Ollama
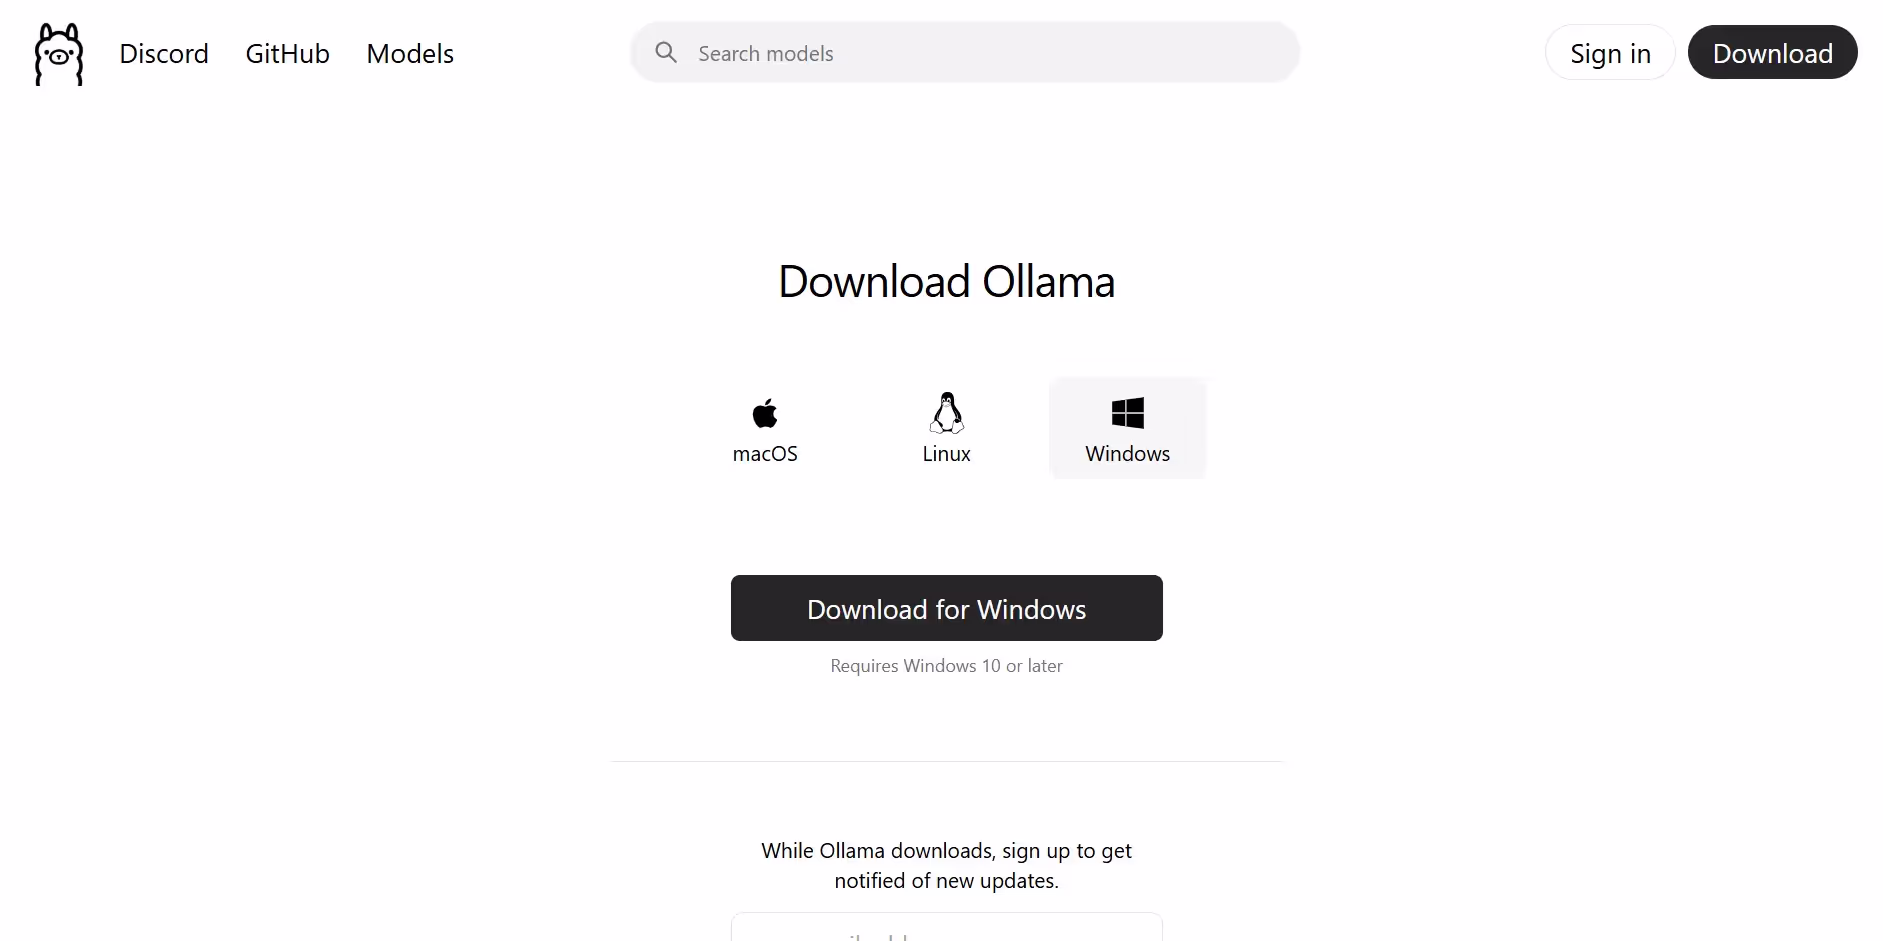
First things first, you need to download Ollama. Go to the Ollama website.
Click on download, select on Windows option and then click on “Download for Windows” option. Once you click on download, the file starts downloading.
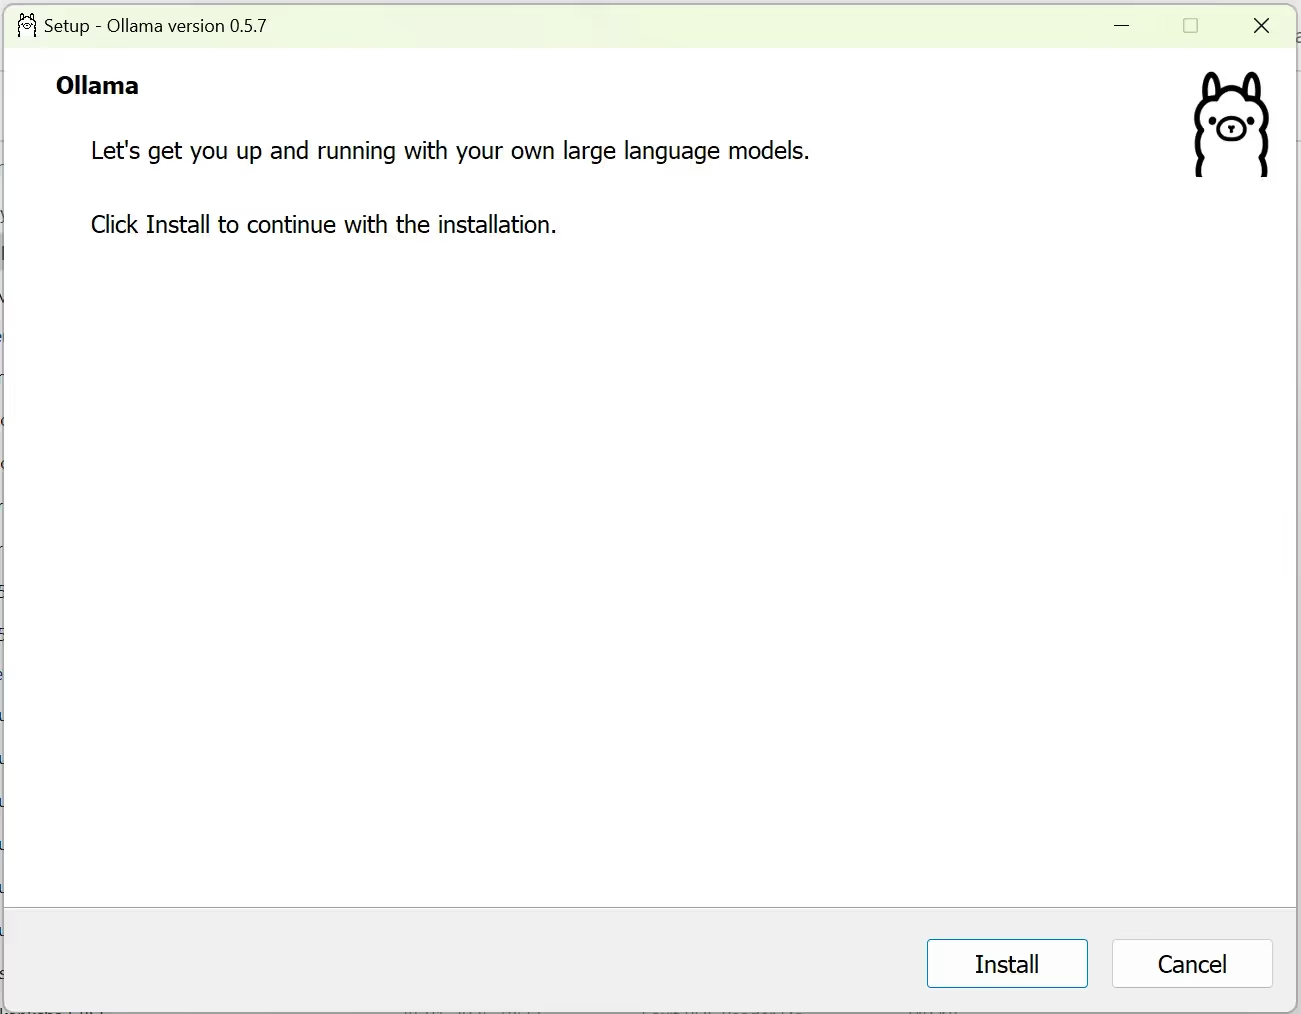
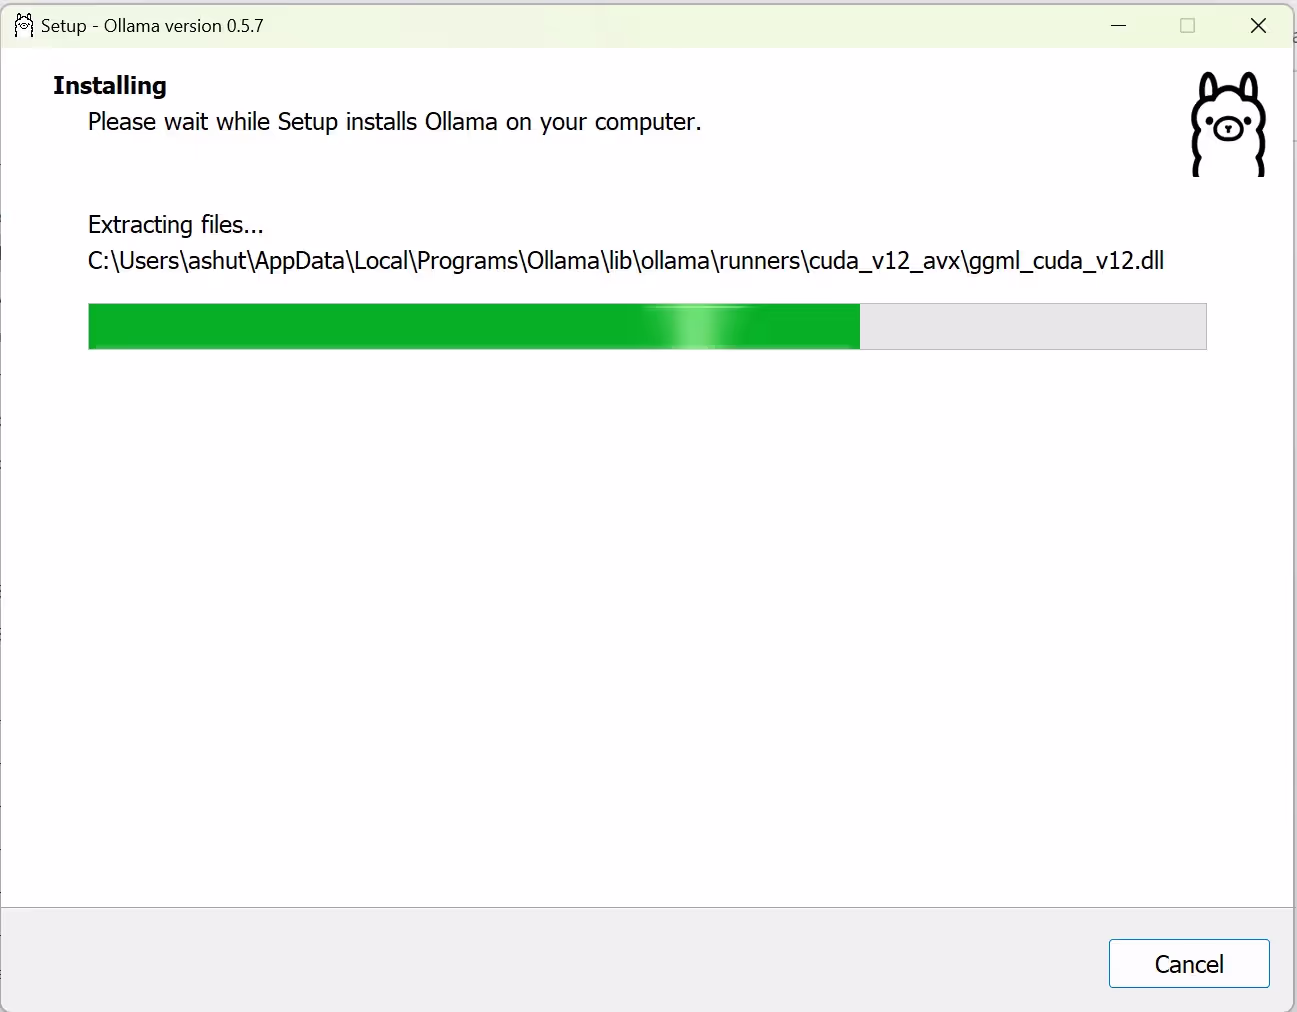
Step 2: Install Ollama on Windows
After downloading, launch the installer and follow the instructions to install Ollama on your Windows machine. This process should only take a few minutes. Once completed, you can open a command prompt or terminal window to start using Ollama. It’s that simple!
Step 3: Running DeepSeek Models with Ollama
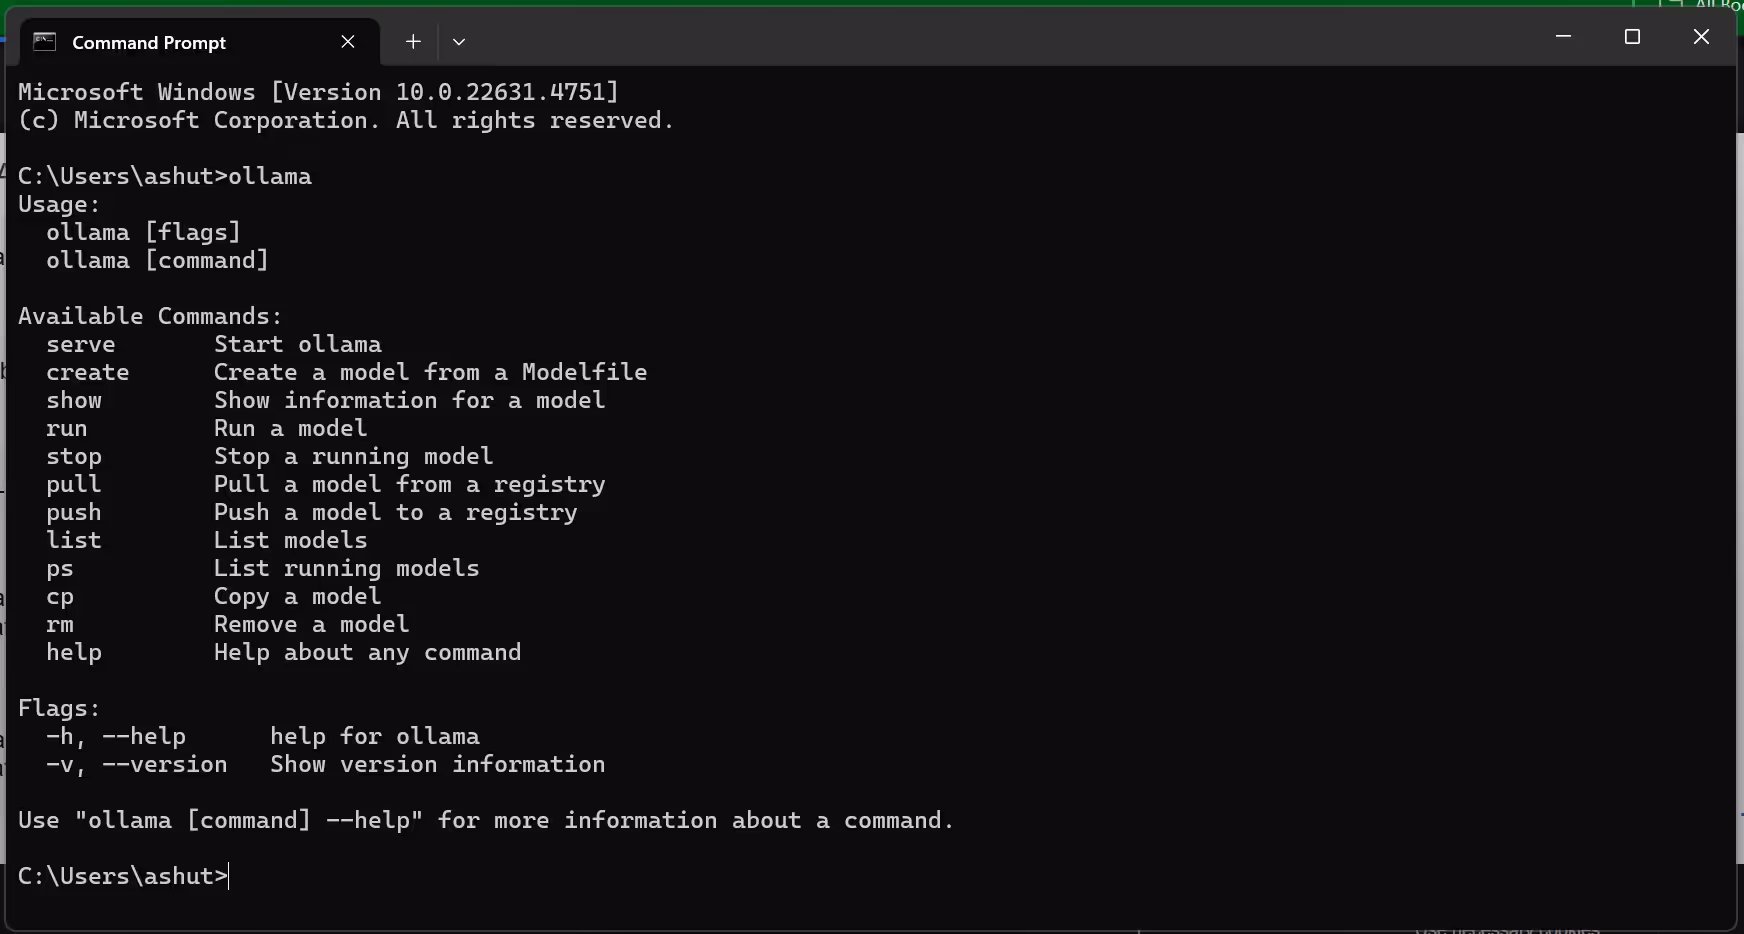
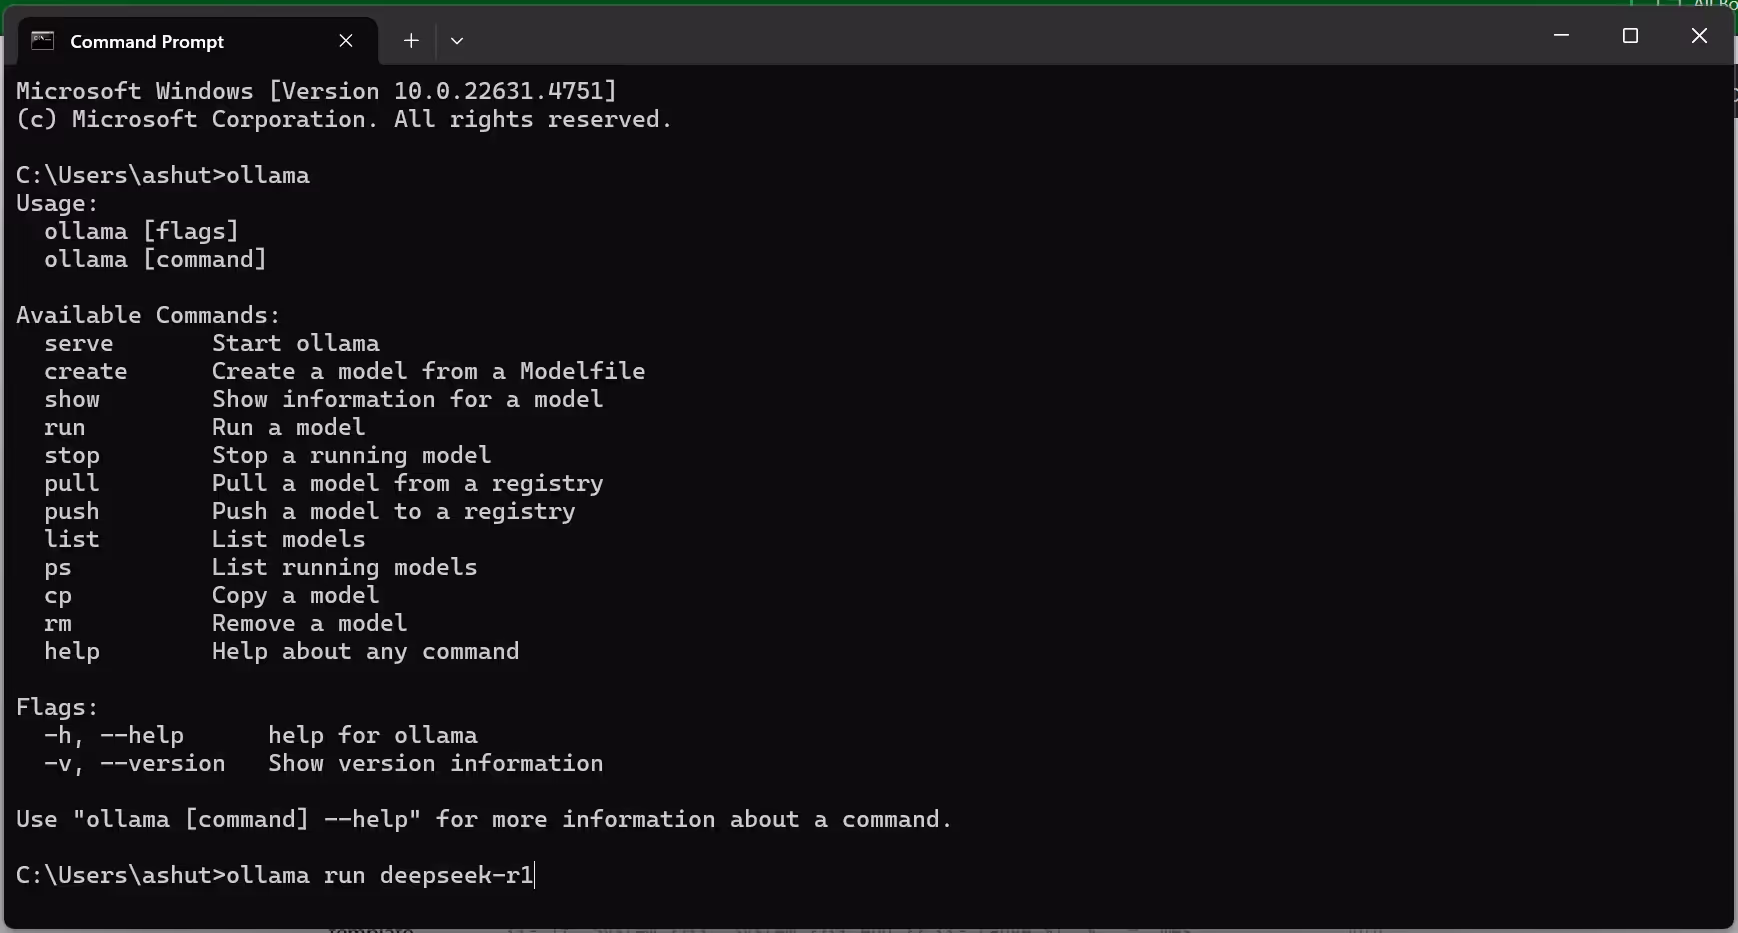
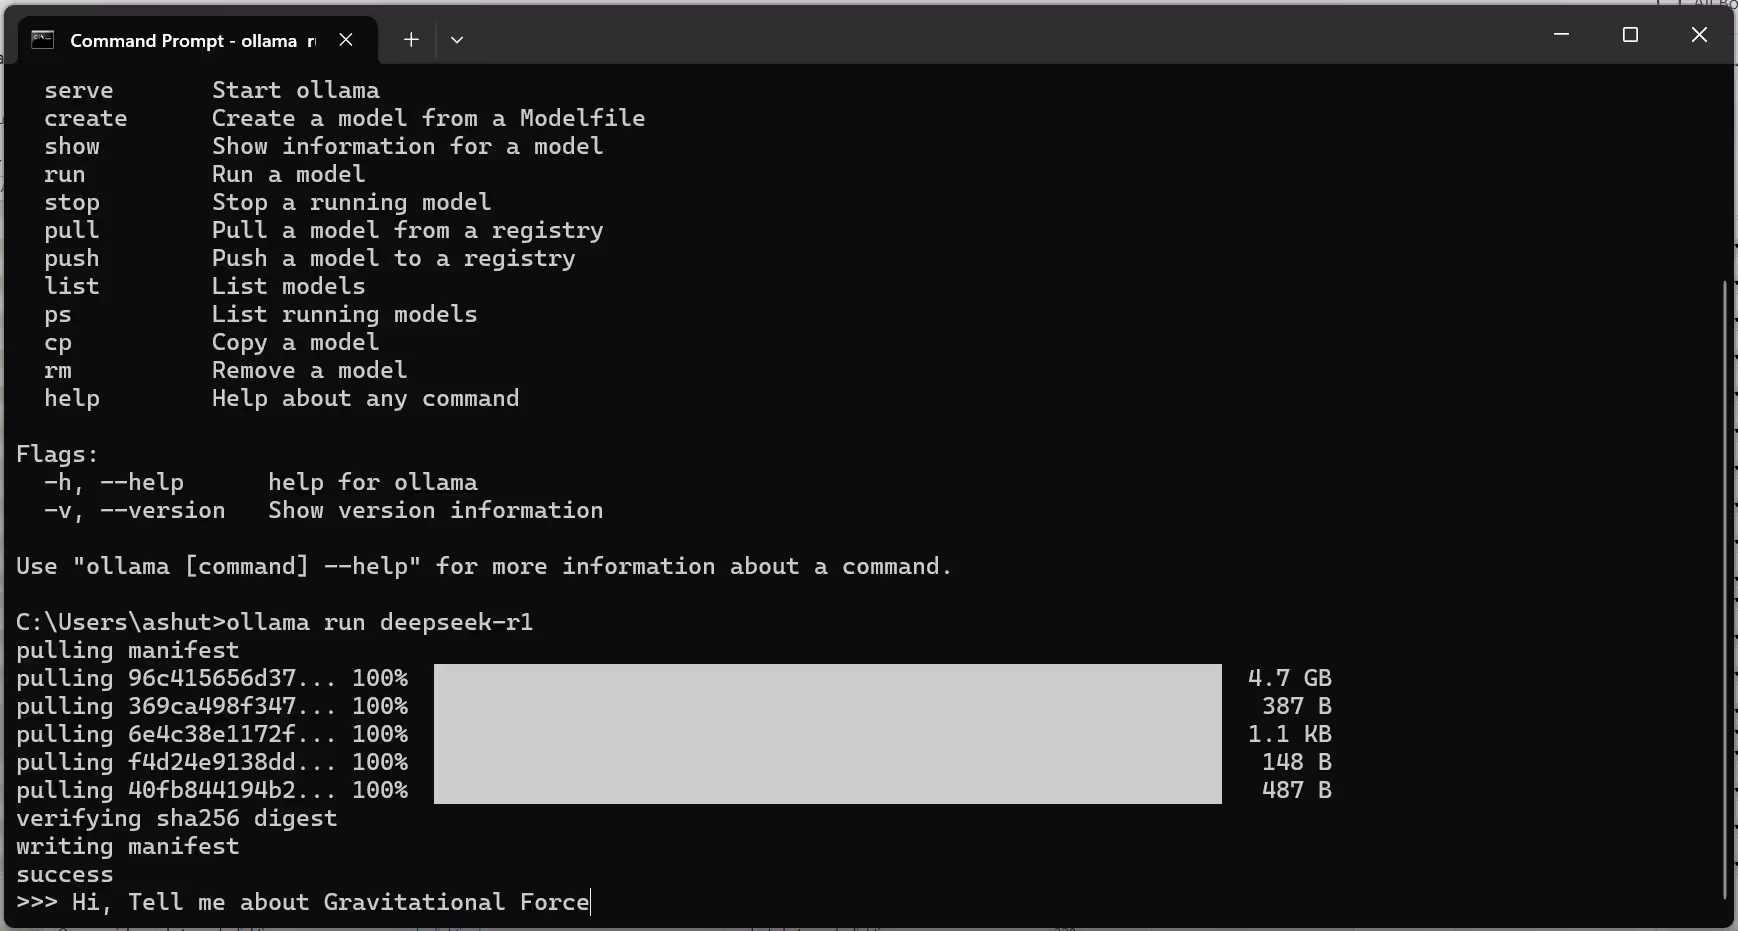
Now that you have Ollama installed, it’s time to download and run the DeepSeek model. Go to search on your task bar and search “Command Prompt”. Open the command prompt and type the commad “Ollama” and click enter.
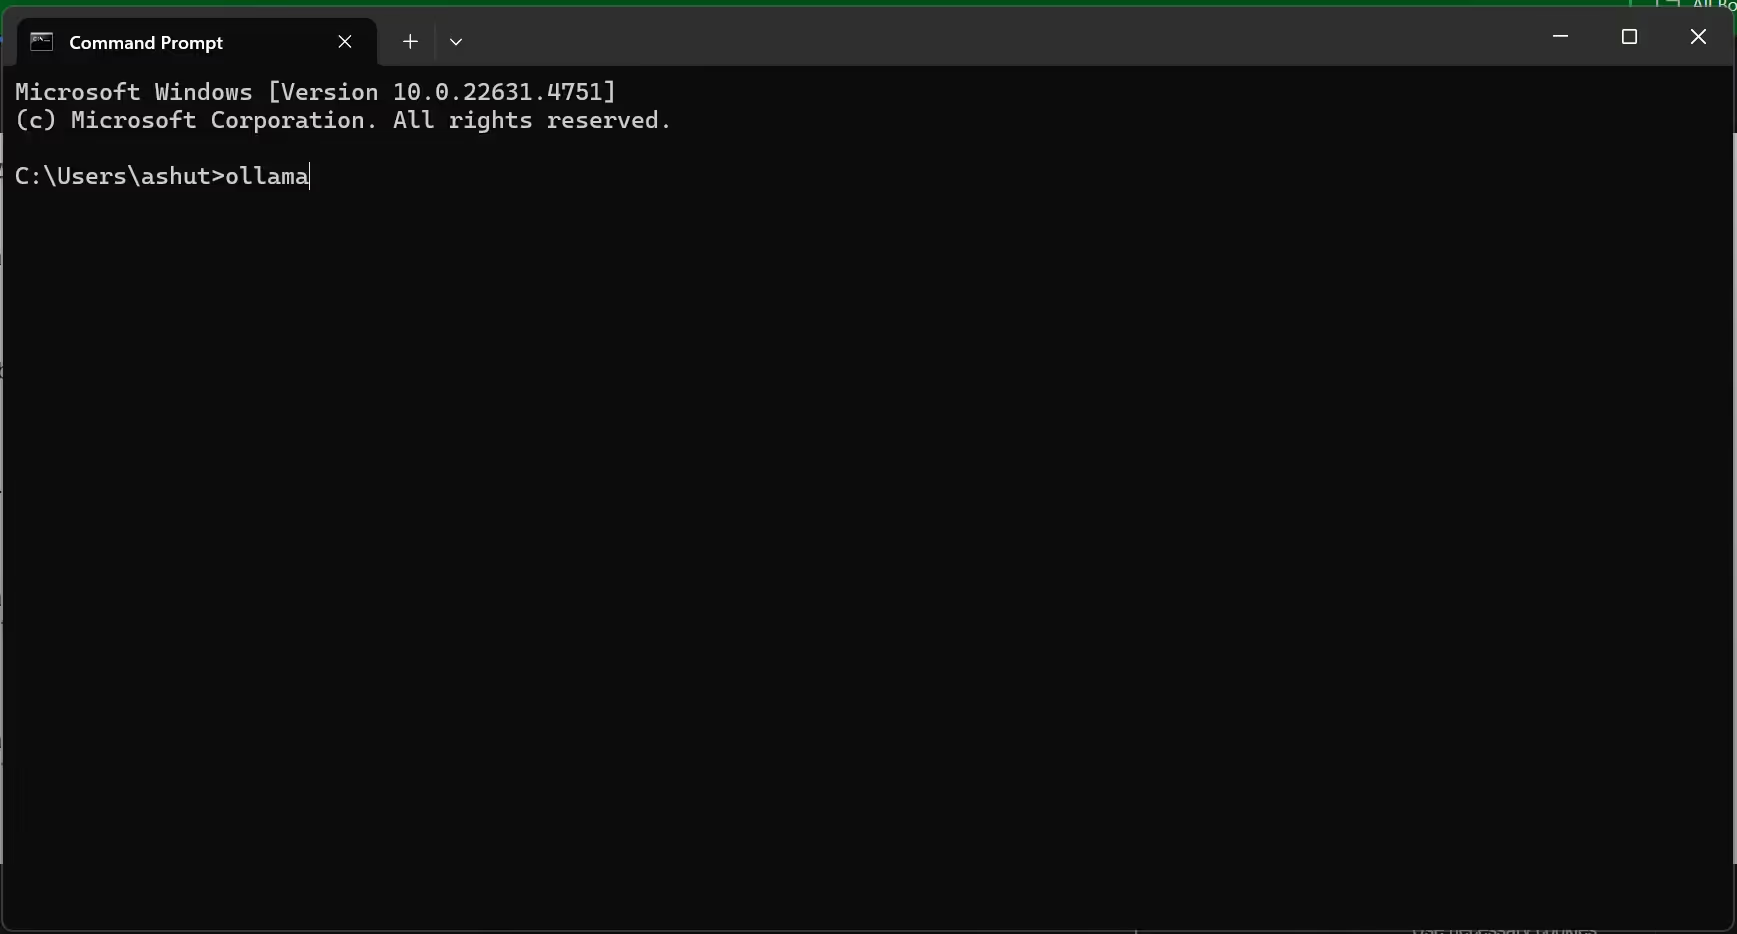
After you type and enter the command “Ollama” you receive the available command.
Now again go to the Ollama website and go to models..
Select the models from the list
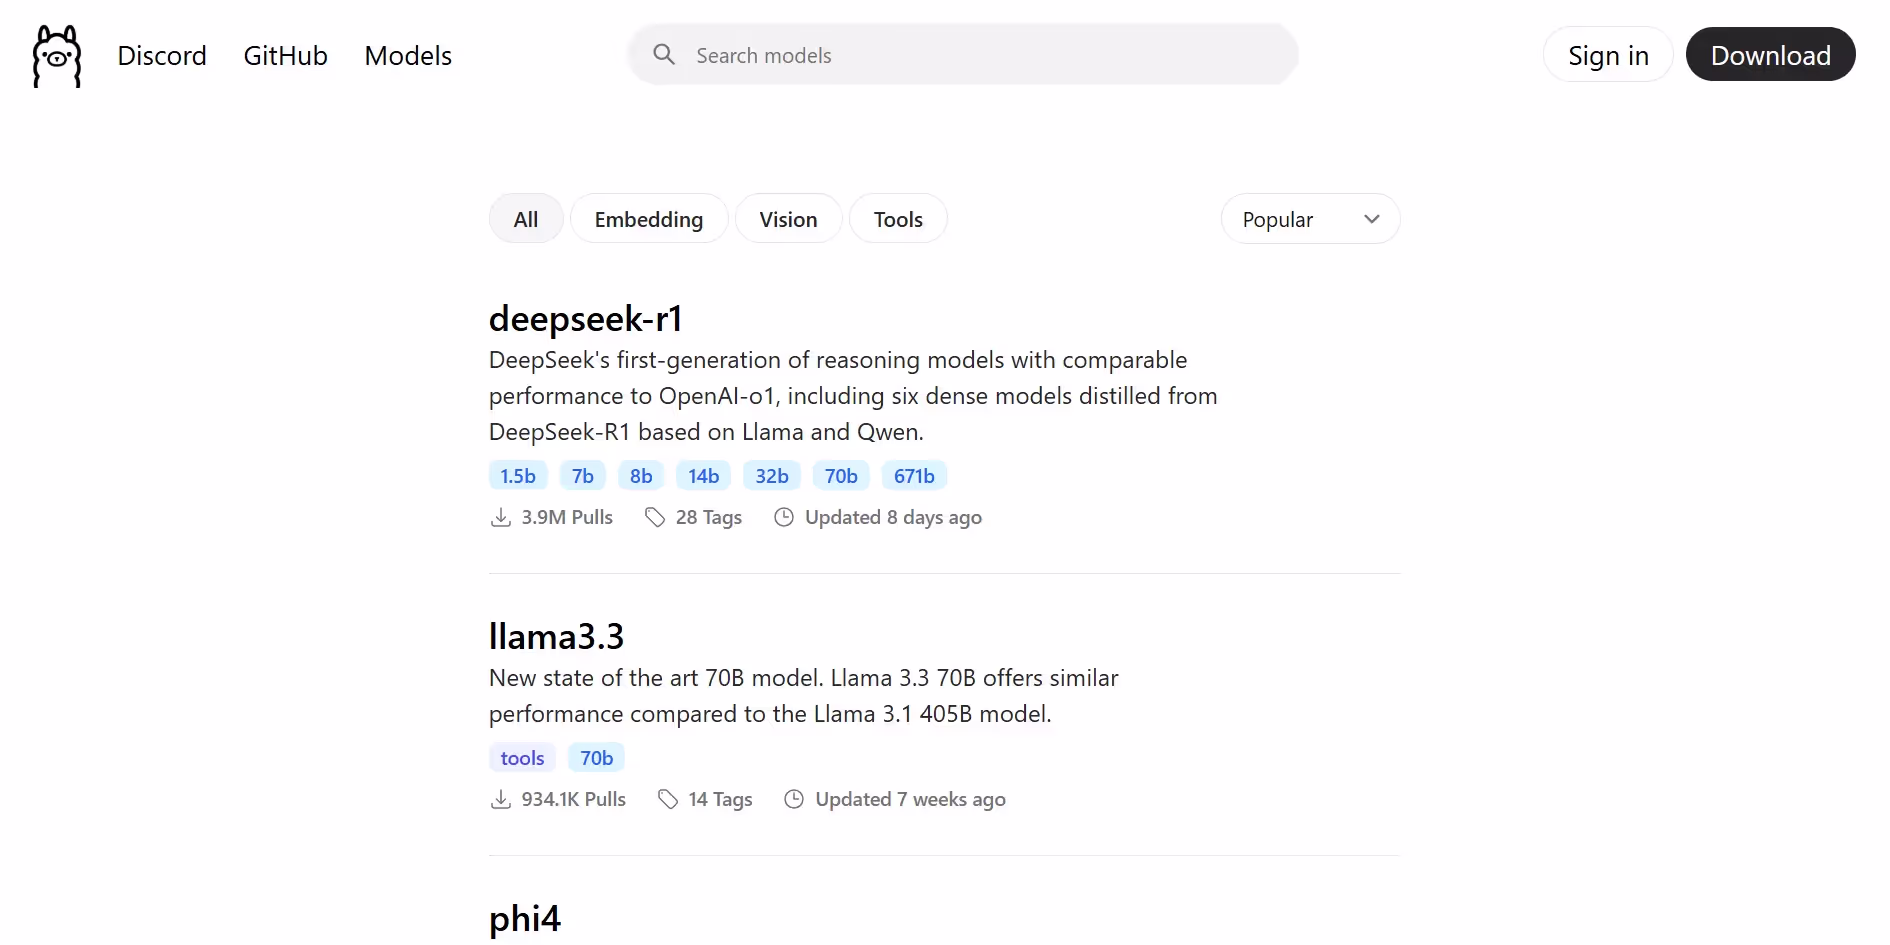
Among the list we will select the most popular “Deepseek R1” model and install it. Hence, click on deepseek-r1.
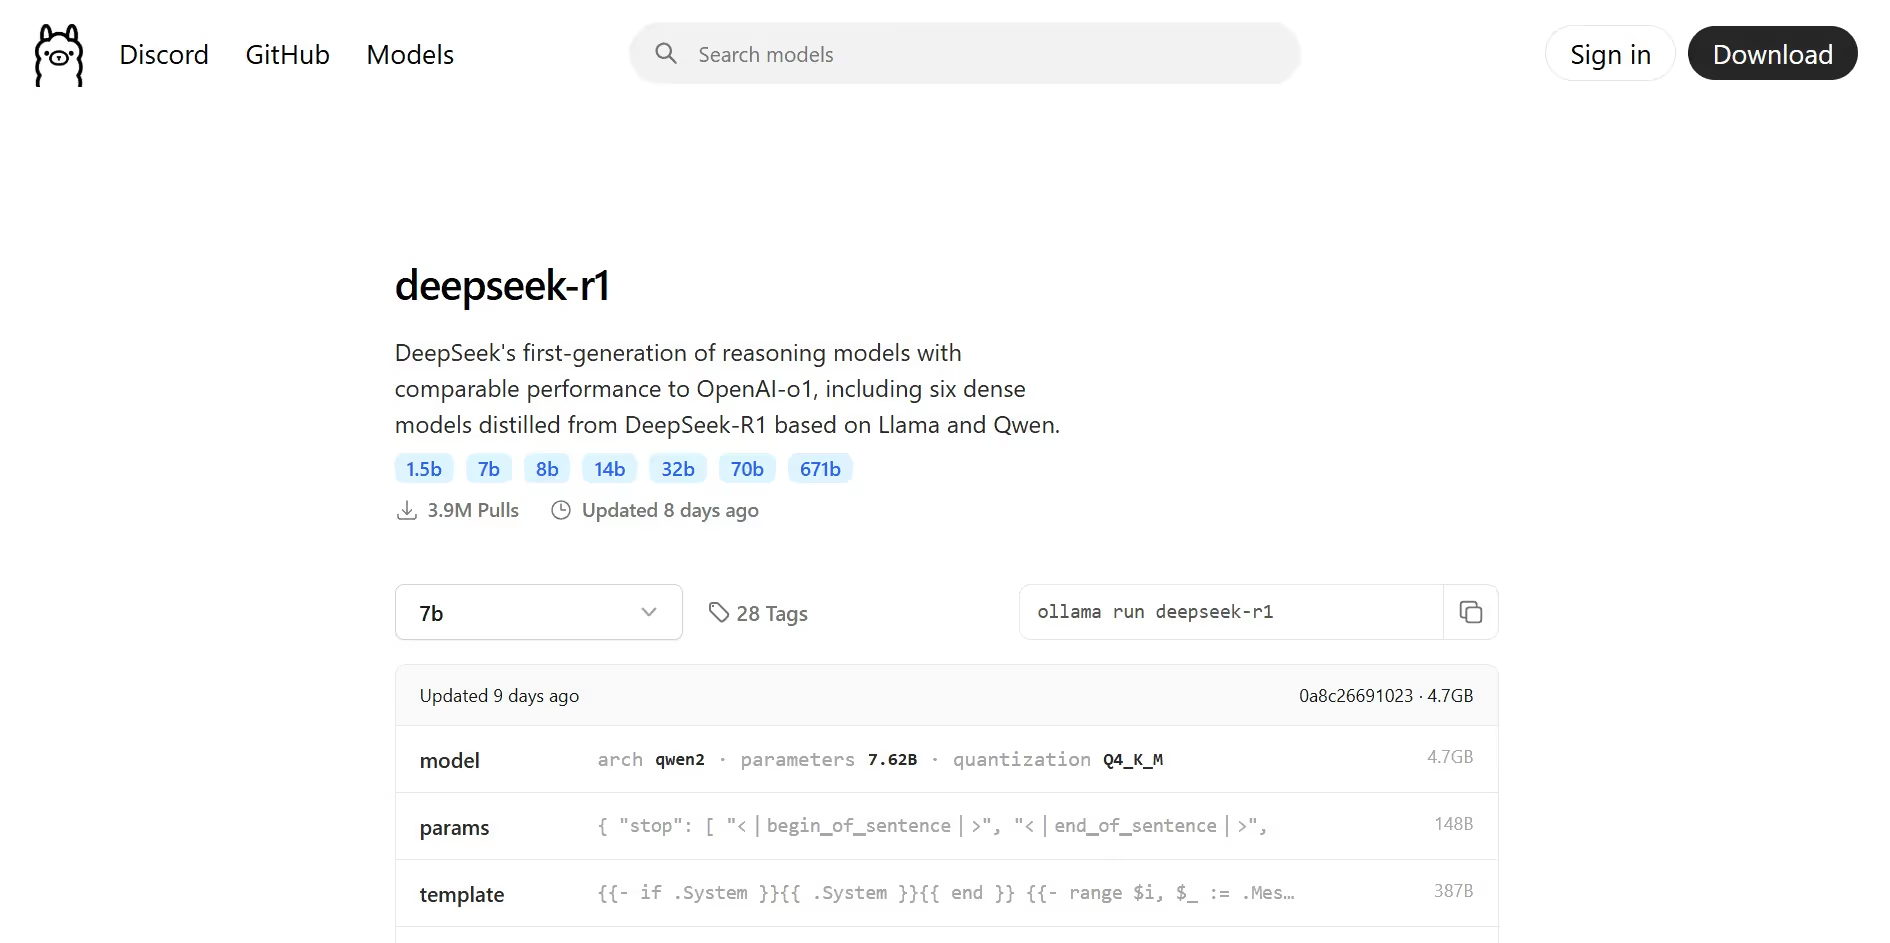
Now copy the following code from the right hand side.
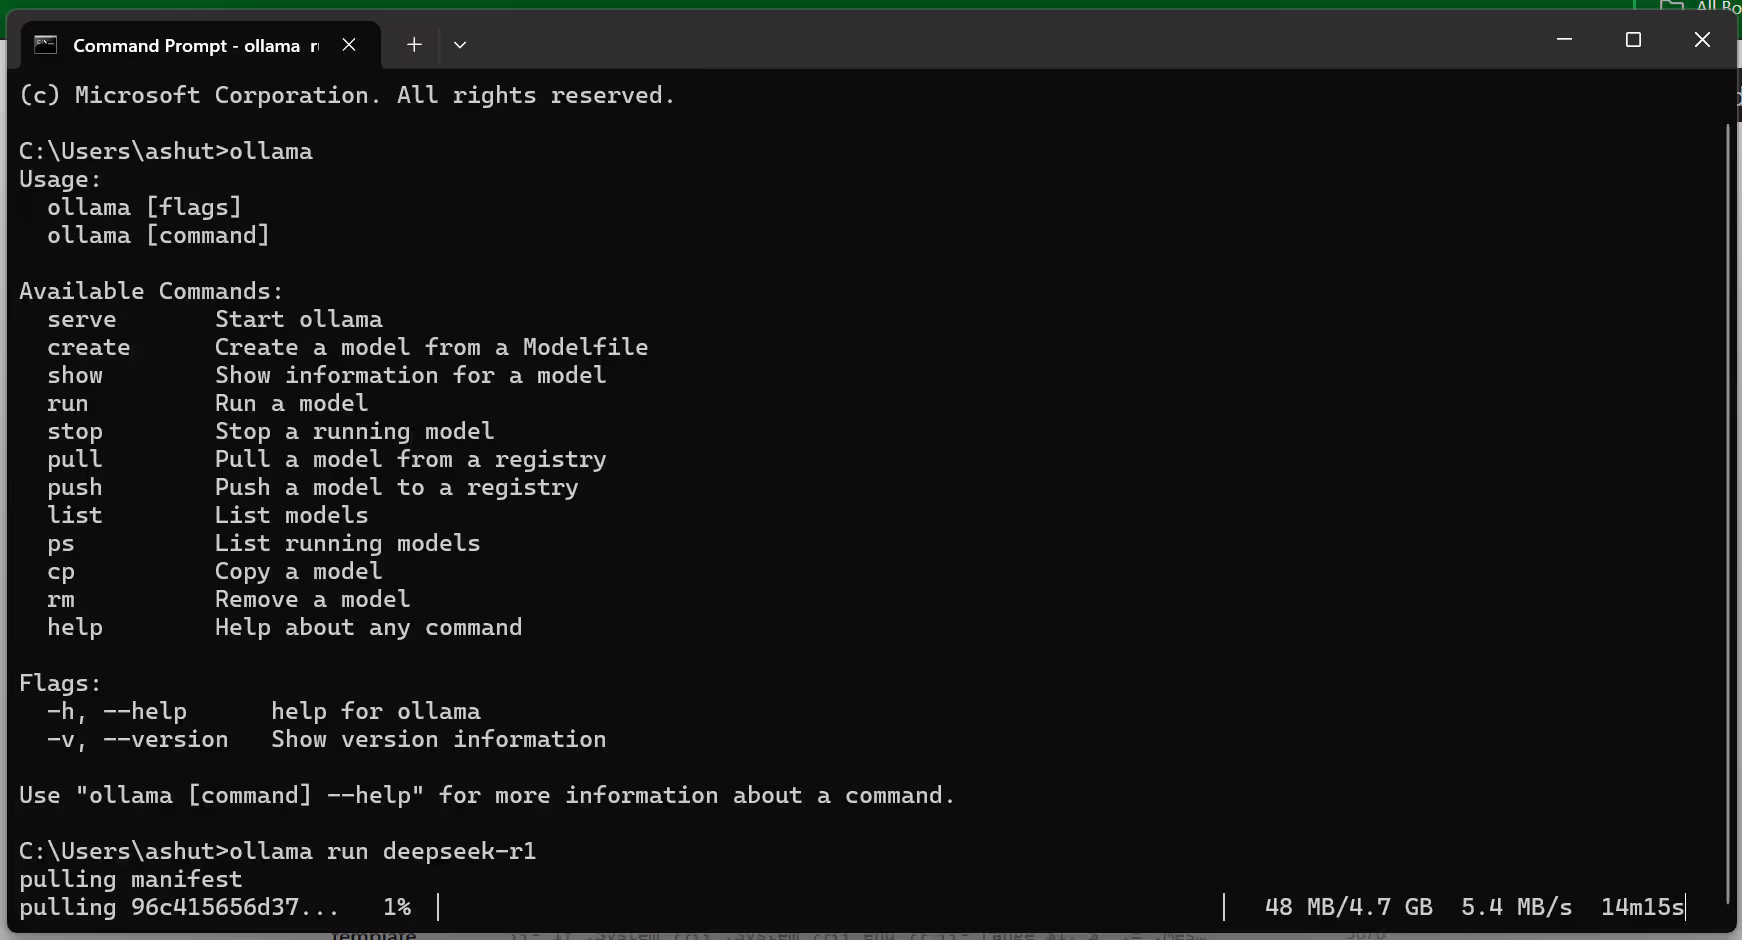
“ollama run deepseek-r1”
Now paste this code in the command prompt and press enter
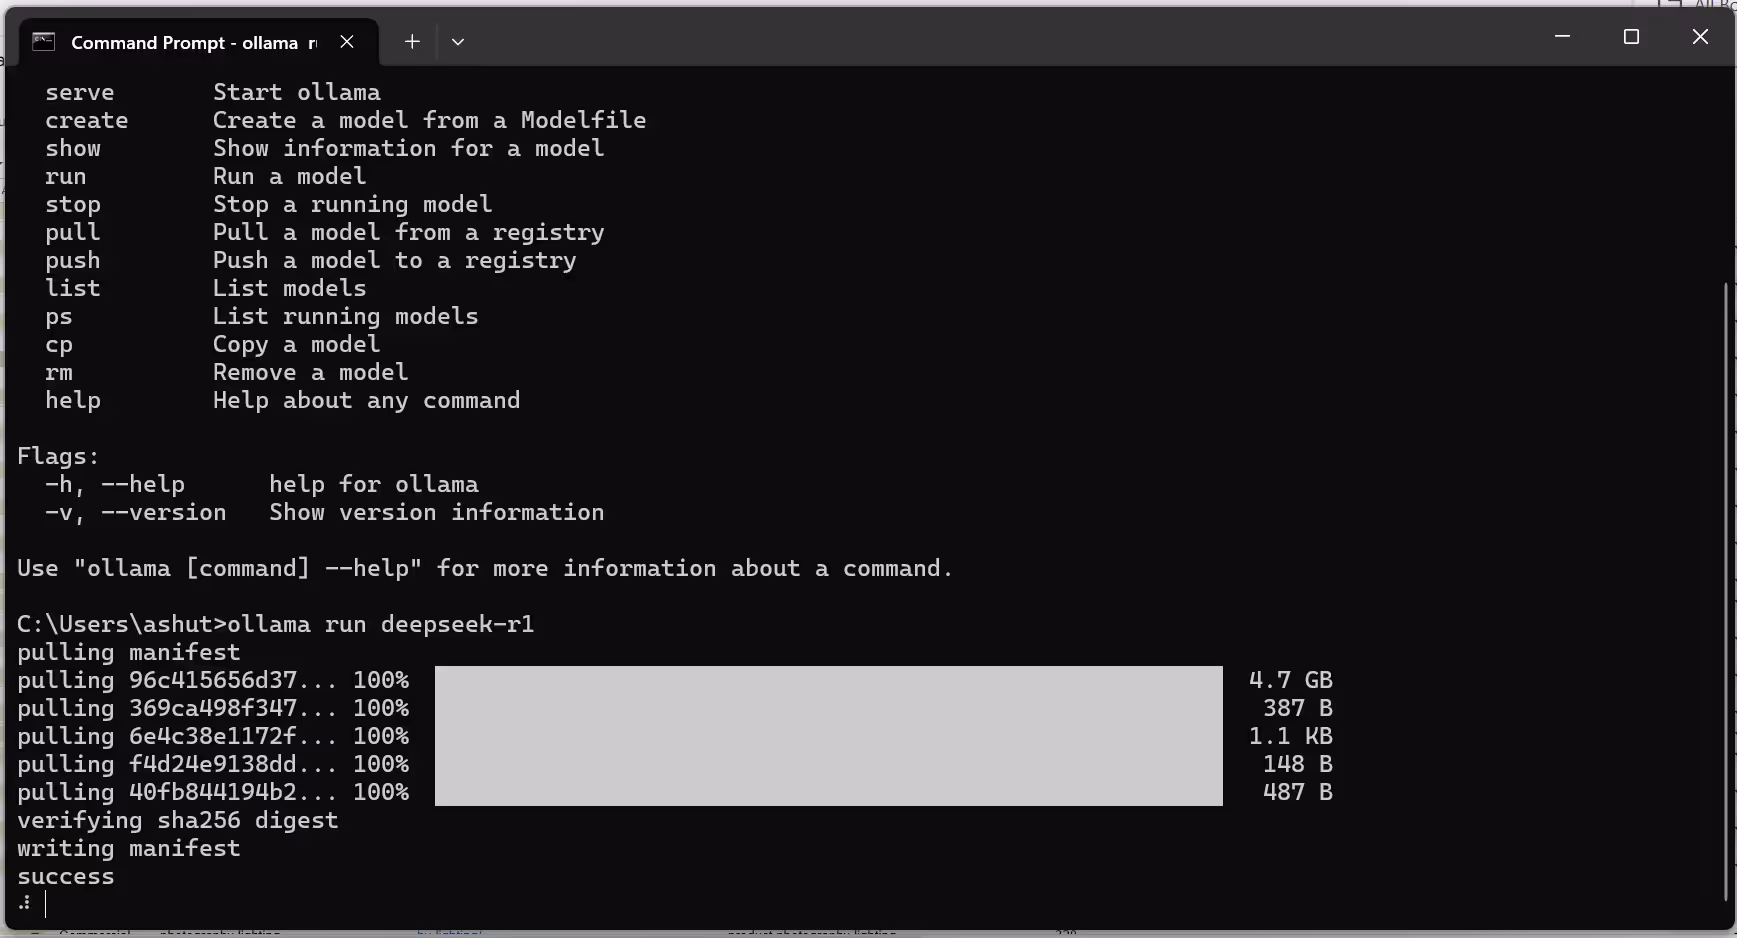
Once, you press enter, the model starts downloading.
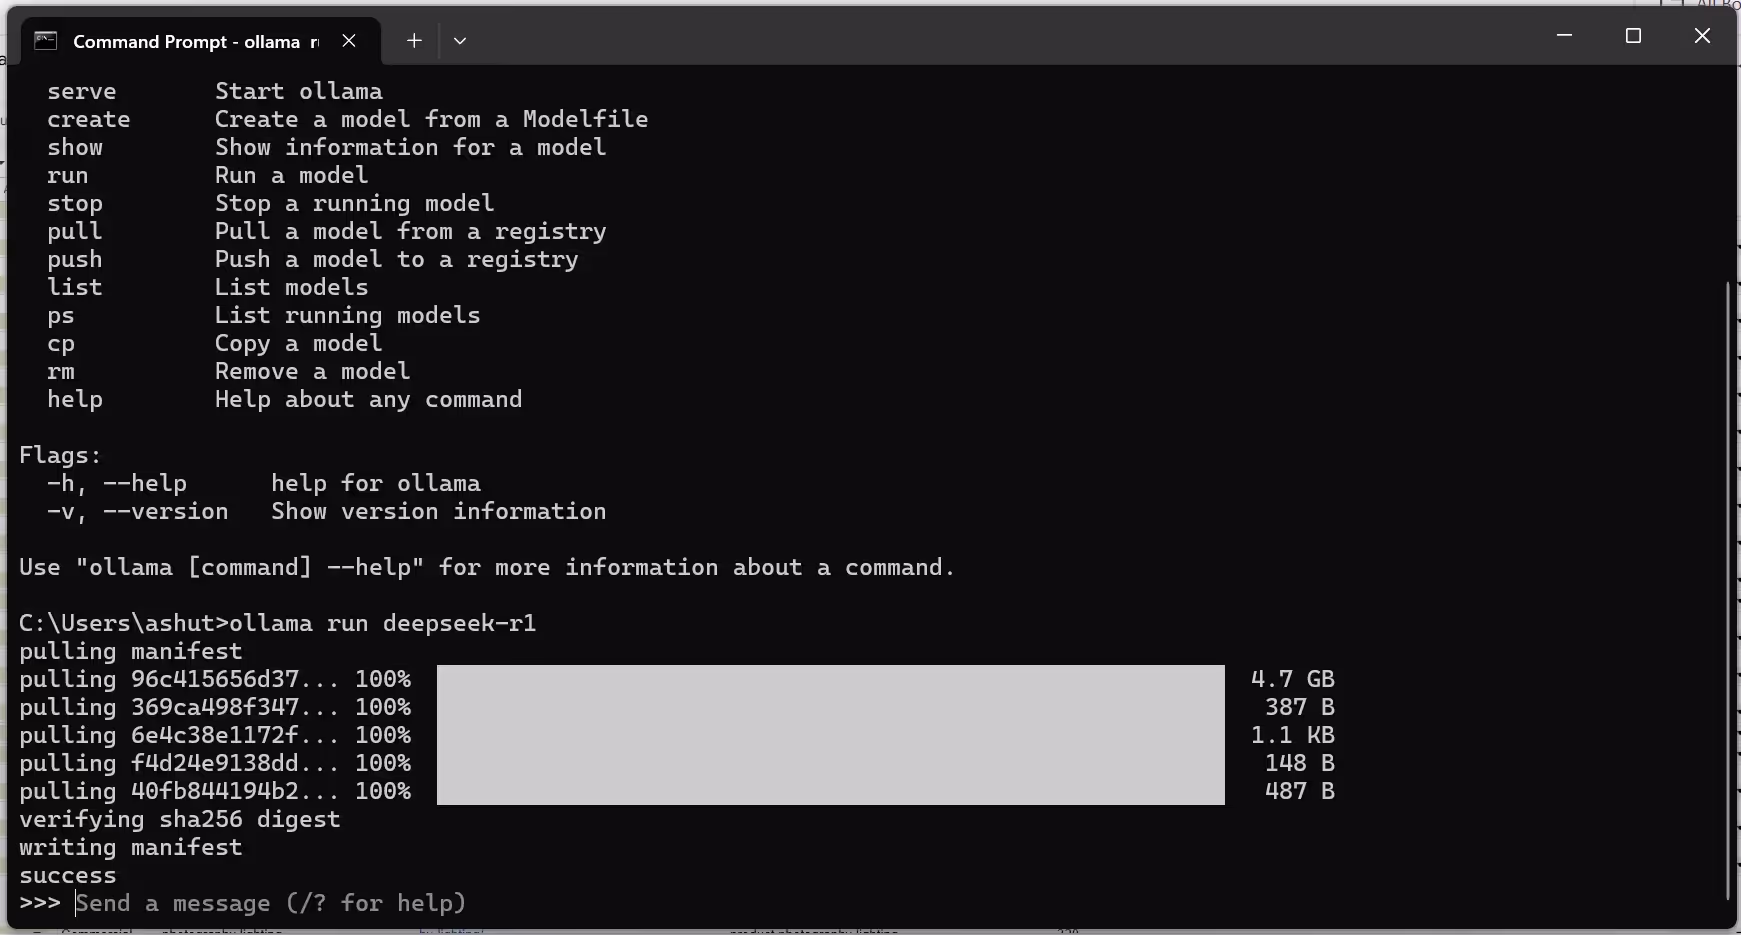
Now, after the downloading of the Deepseek model r1 is complete, its time to interact.
Using DeepSeek Models Locally
Now that you've set up DeepSeek on your Windows machine, it's time to explore how to interact with the models. You can engage with DeepSeek in two main ways: through the command line or via a chatbox interface. Both methods offer unique advantages, so let’s explore each one.
Interacting with the Model via Command Line
Using the command line to interact with DeepSeek is straightforward and efficient. Here’s how to do it:
Step 1: Open Command Prompt
Start by opening your Command Prompt. You can do this by searching for "cmd" in the Windows search bar.
Step 2: Run the Model
To initiate DeepSeek, type the following command:
ollama run deepseek-r1
This command will load the DeepSeek model, allowing you to start interacting with it.
Step 3: Engage with the Model
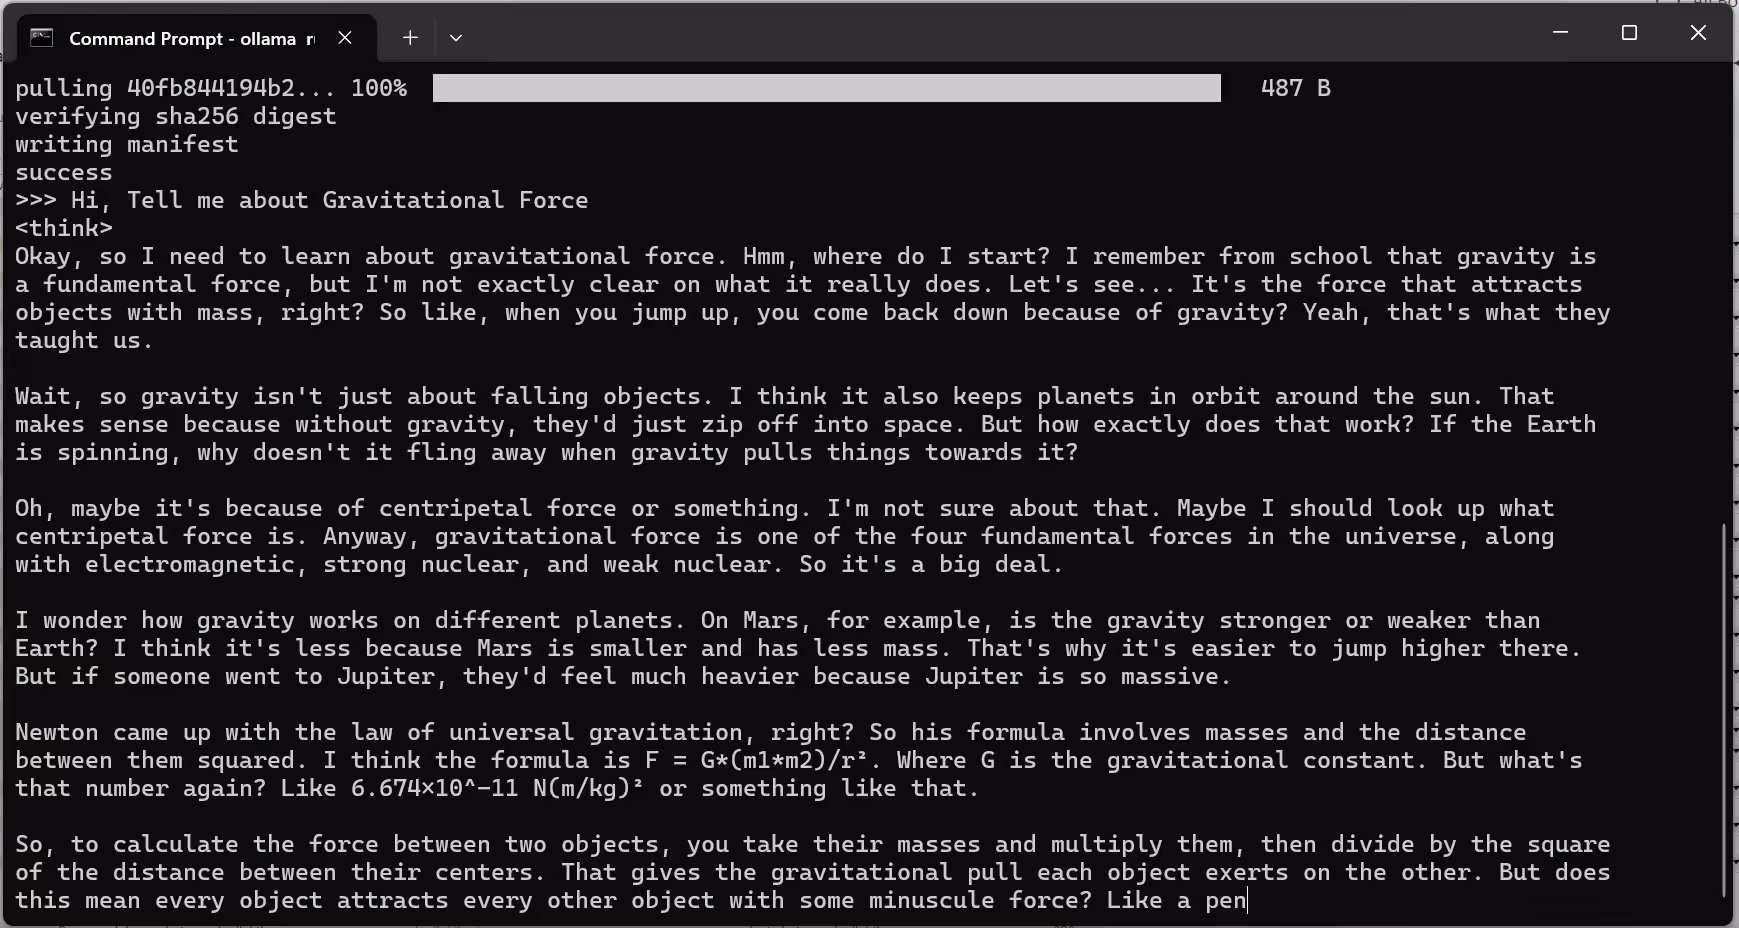
Once the model is running, you can type your questions or prompts directly into the command line. Hit Enter after each input, and you’ll receive responses in real-time. This method is great for quick queries or testing specific functionalities.
For example, I entered, “Tell me about Gravitational Force”. The reply from the model is given below:
Step 4: Exit the Session
When you're finished, simply use Ctrl + D to exit the model session.
Interacting with the Model via ChatBox AI
If you prefer a more visual and user-friendly experience, using a chatbox interface is an excellent option. Here’s how to set it up:
Step 1: Download Chatbox AI
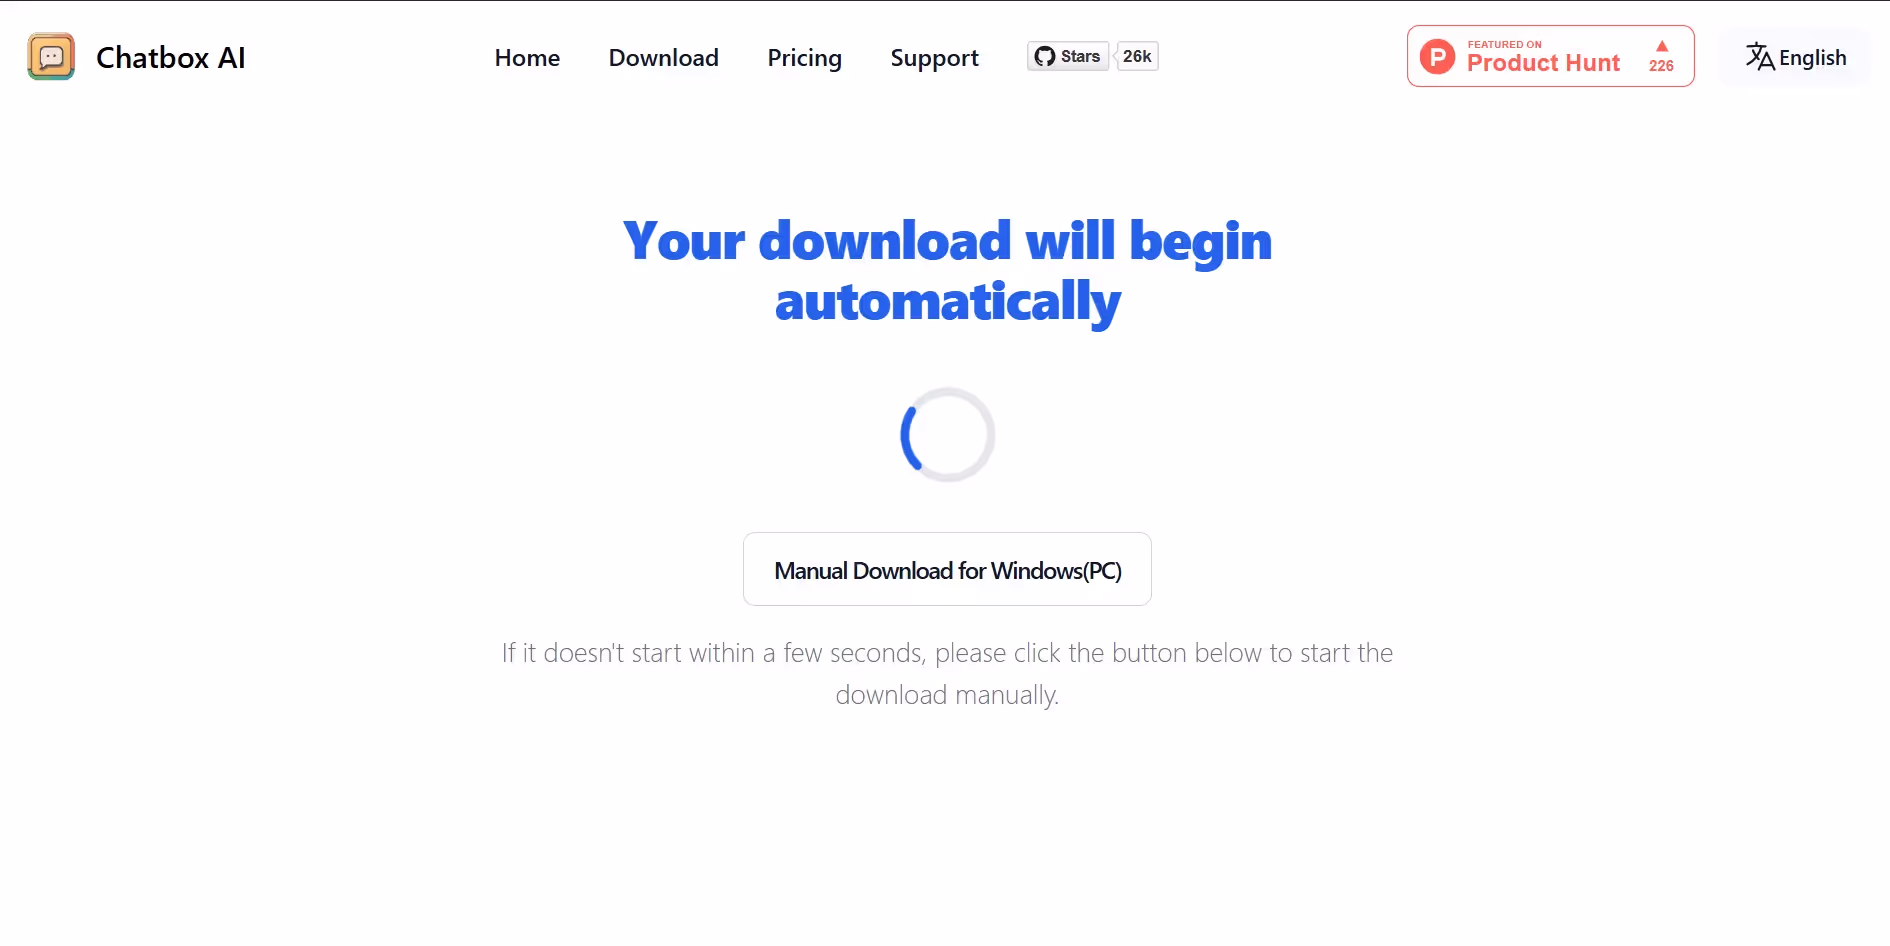
Go to Chatbox AI website and click on free download for windows

Now, you will see download will start on your device.
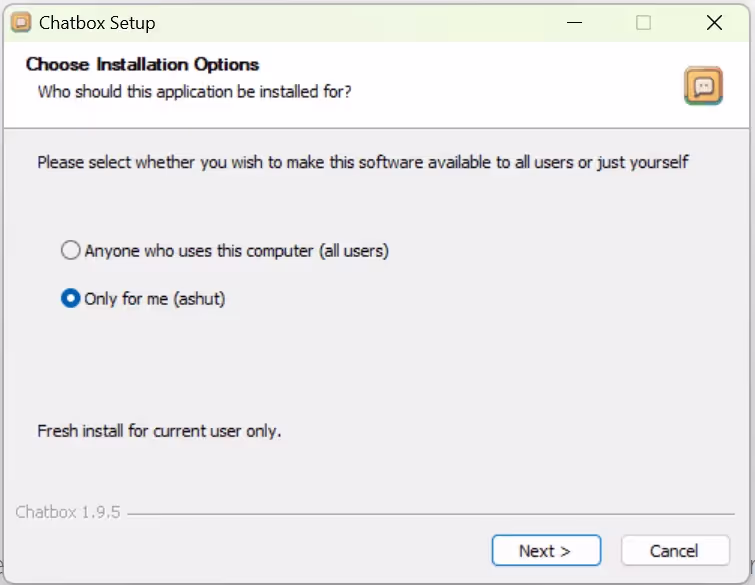
Step 2: Install Chatbox AI
After download is complete, go to your file manager and install the the Chatbox AI
Step 3: Loading the Model
After installation, open the Chatbox AI app and click on “Use Local Model Option”.

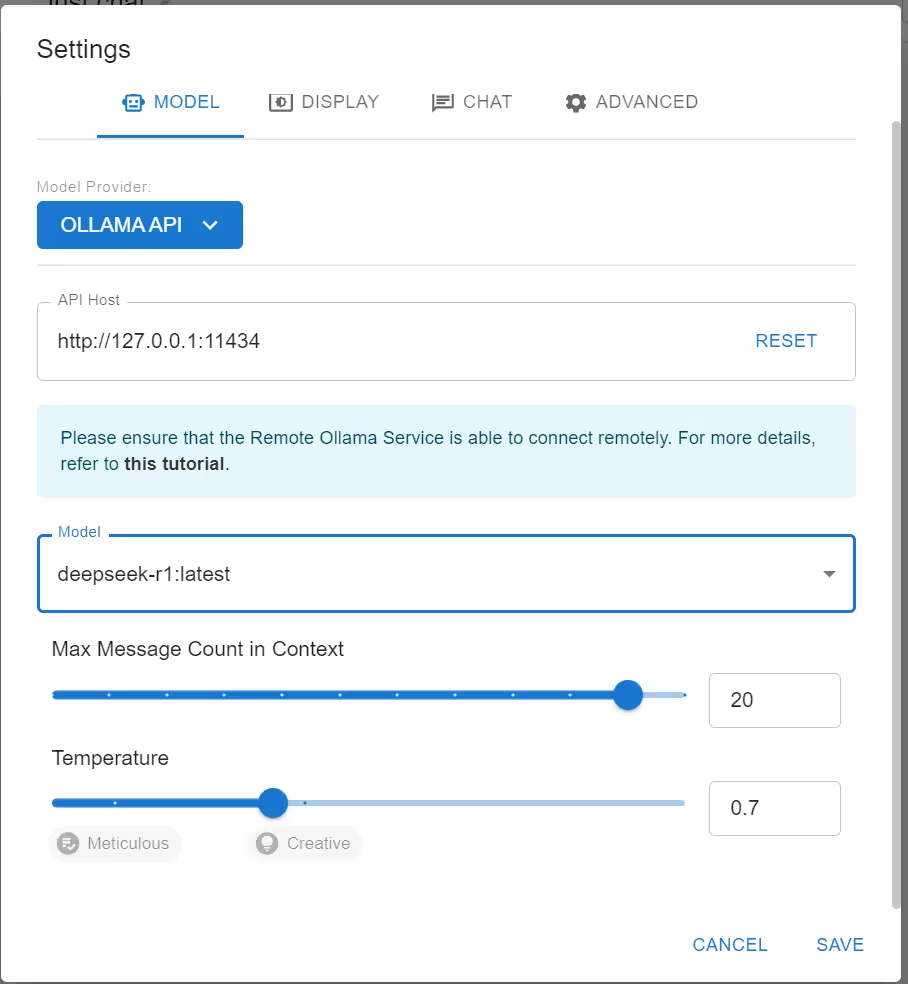
After you select Local Model, a list of various AI models will open, select Deepseek from the list. Now in model provider, select OLLAMA API as it is installed in local machine. Now click on save
Step 4: Interacting with Model
Now a Chatbox interface will open where you can enter your prompt and press enter.
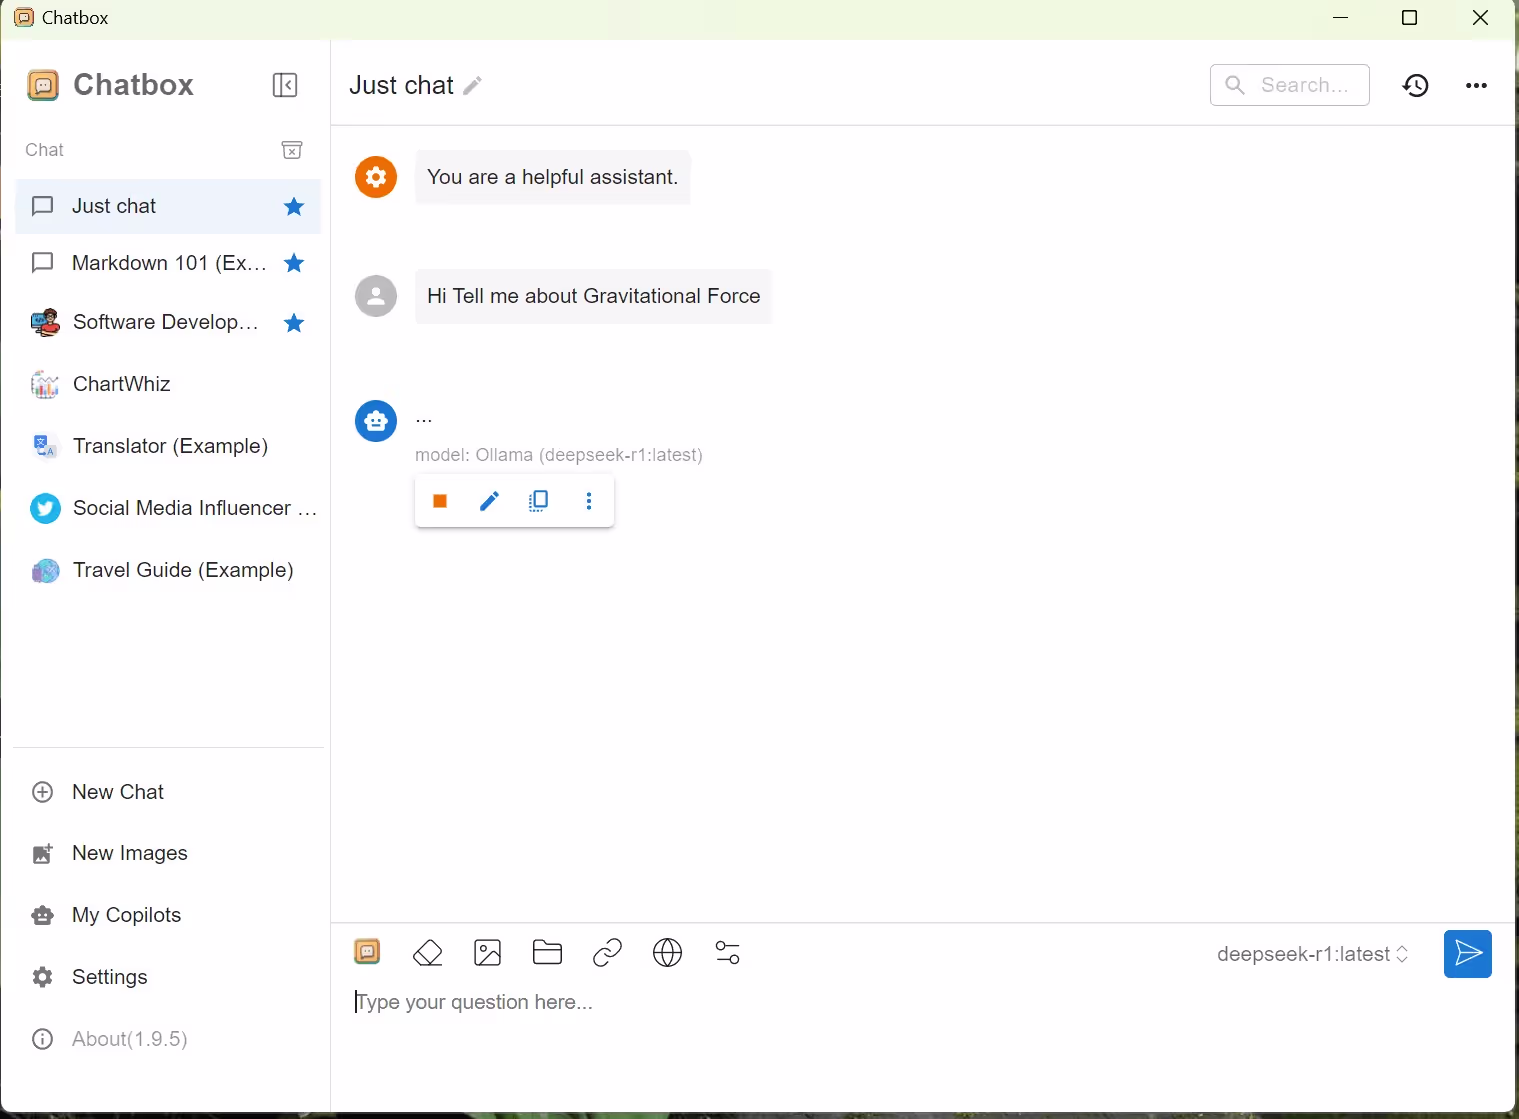
For example, here we have again input the same prompt “Tell me about Gravitational Force”, and it gives the result.

In chatbox mode you can use deepseek like any other usual AI apps.
Managing and Updating Your DeepSeek Installation
Once you have DeepSeek up and running, it’s important to manage and update your installation regularly to ensure optimal performance and access to new features.How to Update DeepSeek ModelsKeeping your DeepSeek models updated is crucial for accessing improvements and new functionalities. Here’s how to do it:
- Check for Updates: Regularly visit the official DeepSeek website or GitHub repository for announcements regarding updates.
- Run Update Command: If you’re using a package manager, you can typically update models by running a command like:
ollama update deepseek-r1
- This command will fetch the latest version of the model directly from the server.
- Verify Installation: After updating, verify that the model is functioning correctly by running a few test queries or commands.
Best Practices for Model Management
To ensure smooth operation of your DeepSeek installation, consider these best practices:
- Regular Backups: Make regular backups of your model files and configurations. This ensures that you can quickly restore your setup in case of any issues.
- Documentation: Keep notes on any changes you make during configuration or updates. This documentation will be invaluable if you need to troubleshoot later.
- Community Engagement: Join forums or communities related to DeepSeek or AI model deployment. Engaging with others can provide insights into best practices and troubleshooting tips.
- Performance Monitoring: Continuously monitor performance metrics after updates or configuration changes to ensure that everything runs smoothly.
Conclusion
In summary, to run DeepSeek locally on Windows, you need to install the necessary software, configure memory settings, and choose your interaction method—whether via command line or chatbox. Regular updates and proper management are essential for optimal performance. Now that you have DeepSeek set up, don’t hesitate to explore its various applications. Whether for creative writing, coding assistance, or data analysis, the possibilities are endless. Dive in and make the most of this powerful AI tool!
How to Run DeepSeek Models Locally on Windows FAQs
What are the system requirements for running DeepSeek locally on Windows?
To run DeepSeek locally, your system should have Windows 10 or later, a multi-core processor (quad-core recommended), at least 8GB of RAM (16GB or more is ideal), and an SSD with at least 5GB of free space. A high-performance NVIDIA GPU with CUDA support is also recommended for optimal performance.
How do I install DeepSeek on Windows?
To install DeepSeek, first download and install Ollama from the official website. After installation, open your command prompt and run the command ollama pull deepseek-r1 to download the model. Once downloaded, you can start it using ollama run deepseek-r1.
Can I use DeepSeek without a powerful GPU?
Yes, you can run DeepSeek without a powerful GPU, but performance may be slower. The model will still function using your CPU, but for better speed and efficiency, a compatible NVIDIA GPU is recommended.
How do I troubleshoot installation issues with DeepSeek?
If you encounter installation issues, ensure that all dependencies are installed correctly, such as Python and the CUDA Toolkit. Check that your hardware meets the minimum requirements and verify that you have sufficient disk space. Restarting your computer can also help resolve temporary issues.
How can I update my DeepSeek models?
To update your DeepSeek models, open your command prompt and run the command ollama update deepseek-r1. This will check for the latest version of the model and download any updates available. Regularly updating ensures you have access to new features and improvements.


%20(600%20x%20400%20px)_20251231_205555_0000.avif)