


Incorporating transparent backgrounds into your Google Slides presentations can significantly enhance visual appeal and clarity. Transparent backgrounds offer design flexibility, allowing for seamless integration of images and text, which leads to improved readability and a more professional appearance. By removing distracting elements and focusing on essential content, you can create engaging slides that effectively communicate your message.
This guide will show you how to make a background transparent in Google Slides using multiple methods. Follow this step-by-step tutorial to easily remove backgrounds, enhance readability, and create visually appealing presentations.

What Is Google Slides?
Google Slides is a free, cloud-based presentation software developed by Google as part of the Google Workspace (formerly G Suite) suite. It allows users to create, edit, and collaborate on presentations from any device with an internet connection.
Google Slides is a popular alternative to Microsoft PowerPoint, offering seamless integration with Google Drive, Google Docs, and Google Sheets.
Key Features of Google Slides
1. Cloud-Based and Accessible Anywhere
- Google Slides is entirely online, meaning you can access and edit presentations from any device desktop, laptop, tablet, or mobile.
- All changes are automatically saved to Google Drive, eliminating the risk of data loss.
2. Real-Time Collaboration
- Multiple users can edit, comment, and suggest changes simultaneously.
- Changes appear instantly, making teamwork more efficient.
- Users can control permissions (View, Comment, Edit) for better security.
3. Free and Easy to Use
- Google Slides is completely free with a Google account.
- The user interface is simple and intuitive, making it easy to create presentations quickly.
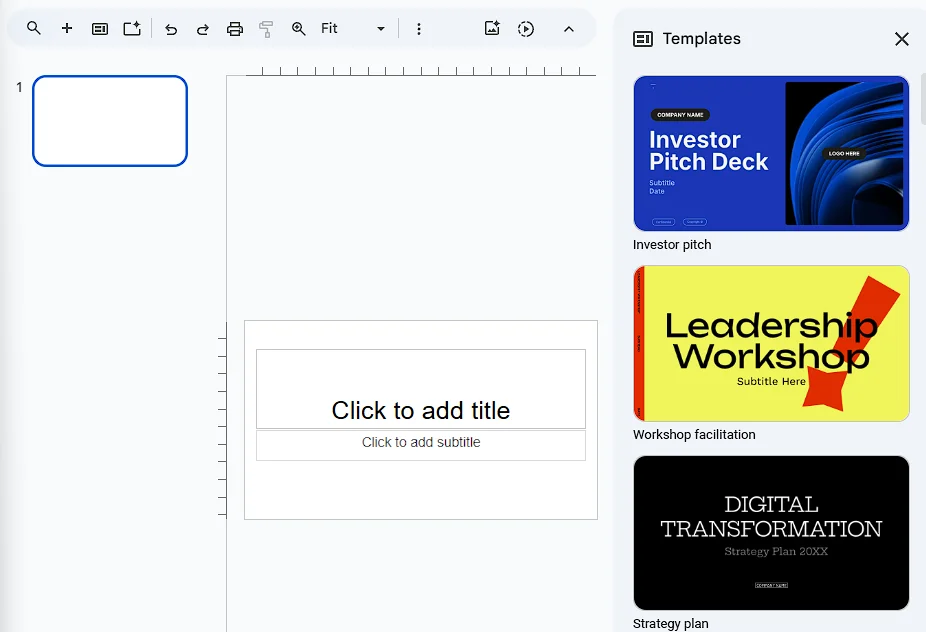
4. Extensive Template Library
- It offers pre-designed templates to create professional-looking presentations effortlessly.
- Users can import PowerPoint (.PPTX) files or create slides from scratch.
5. Seamless Integration with Google Services
- Works seamlessly with Google Docs, Google Sheets, and Google Forms.
- You can insert charts, graphs, and tables directly from Google Sheets.
- Supports Google Meet for live presentations.
6. Offline Editing Mode
- With Google Docs Offline, you can work on presentations without an internet connection and sync changes when back online.
7. Supports Multimedia & Animations
- Allows embedding images, videos, audio files, and GIFs.
- Offers slide transitions and text animations for engaging presentations.
8. Export and Sharing Options
- Presentations can be downloaded in PPTX, PDF, JPEG, PNG, and other formats.
- Easily share via email or a shareable link with customizable permissions.
Why Remove Background From Picture in Google Slides?
Removing the background from a picture in Google Slides can significantly enhance the visual appeal and clarity of your presentations. Whether you’re creating professional slides, marketing materials, or educational content, a transparent background helps keep your slides clean, engaging, and easy to understand.
Below are key reasons why removing a background in Google Slides is beneficial.
1. Improves Readability and Focus
- A cluttered or distracting background can take attention away from the main subject of an image.
- Removing the background helps highlight key elements and makes text and other visuals stand out.
- It ensures a clear contrast between content and background, improving slide readability.
Example: If you're adding a product image to a business presentation, removing the background ensures the focus remains on the product itself rather than unnecessary elements in the image.
2. Enhances Slide Aesthetics and Professionalism
- Transparent images blend seamlessly with your slide design, giving a polished and professional look.
- Background-free images look more modern and engaging, making the presentation visually appealing.
- Ensures consistency across slides by eliminating different background colors or patterns.
Example: A logo with a white background might not match a slide with a dark theme. Removing the background allows it to integrate smoothly.
3. Allows for Better Layering and Design Flexibility
- Without a background, images can be easily layered on top of text, icons, or other graphics without creating visual clutter.
- You can position transparent images over different backgrounds, shapes, and colors without worrying about awkward white or colored edges.
Example: If you want to place a cut-out of a person onto different slides with various background themes, removing the background allows the image to blend naturally.
4. Makes Branding and Marketing More Effective
- Businesses and content creators can ensure their logos, product images, or brand visuals look clean without unwanted backgrounds.
- Helps create cohesive brand presentations that maintain design consistency.
Example: A transparent company logo can be used across different slides without appearing as a white box.
5. Saves Space and Optimizes File Size
- Backgrounds often contain unnecessary details that increase file size, making presentations load slower on some devices.
- Removing unwanted backgrounds can help keep your slides lightweight and responsive.
Example: A high-resolution stock photo with a complex background may be several MBs in size, but removing unnecessary elements can reduce it significantly.
6. Increases Creative Possibilities
- With no background, you can merge images, add effects, or create customized visuals that enhance engagement.
- Allows more creative control over how images interact with other elements on your slide.
Example: Teachers can remove backgrounds from educational images to make interactive learning slides more visually appealing.
7. Makes Presentations More Accessible and Clear
- Removing backgrounds ensures that slides are not overcrowded with unnecessary distractions, making them easier to understand.
- Helps maintain clean and organized slides, especially for visually impaired audiences who rely on clear visuals.
Example: If a speaker is presenting to a diverse audience, removing unnecessary backgrounds helps keep the message concise and visually clear.
How to Remove a Background in Google Slides?
Since Google Slides does not have a built-in background remover, you can use external tools like:
- Remove.bg (www.remove.bg): AI-powered tool that removes backgrounds instantly.
- Fotor (www.fotor.com): Offers background removal for free.
- Canva Pro: Allows background removal with one click.
After removing the background, upload the PNG image (with transparency) into Google Slides for a clean, professional look.
Methods to Create Transparent Backgrounds in Google Slides
Google Slides does not have a direct "Remove Background" tool, but there are multiple methods to create transparent backgrounds. The most common method is adjusting the image transparency directly within Google Slides.
Below is a detailed step-by-step guide on how to achieve this.
Adjusting Image Transparency Directly in Google Slides
Google Slides provides a built-in feature to adjust image transparency, allowing you to create a see-through effect for any image. This method works best when you want to fade an image into the background or make text more readable over an image.
Step 1: Open Your Google Slides Presentation
- Go to Google Slides by visiting Google Slides.
- Open an existing presentation or create a new slide deck.
Step 2: Insert an Image
- Click on “Insert” in the top menu.
- Select “Image” > Choose one of the following options:
- Upload from Computer: Select an image from your device.
- Search the Web: Find an image using Google’s built-in search.
- Drive/Photos: Select an image stored in Google Drive or Google Photos.
- The image will appear on your slide. Resize and position it as needed.
Step 3: Open Format Options to Adjust Transparency
- Click on the image to select it.
- Go to the top menu and click “Format Options” (or right-click the image and choose “Format Options” from the dropdown).
- A panel will open on the right side of the screen.
Step 4: Adjust Transparency Using the "Adjustments" Tool
- Click on “Adjustments” in the Format Options panel.
- Find the “Transparency” slider.
- Drag the slider to the right to increase transparency and to the left to make the image less transparent.
- Adjust the Brightness and Contrast sliders if needed to enhance the image appearance.
Step 5: Finalizing the Transparent Background
- If the transparency level looks good, click anywhere outside the image to exit the adjustments panel.
- You can layer the transparent image behind text or other elements to make the slide visually appealing.
Removing Backgrounds Using External Tools
Since Google Slides does not have a built-in background removal tool, you’ll need to use external tools to make an image background transparent before adding it to your slides. Below are two easy methods using Remove.bg and PhotoRoom, both of which offer AI-powered background removal.
Using Remove.bg
Remove.bg is a free online tool that automatically removes backgrounds from images in one click. It’s ideal for presentations where you need a clean, transparent image without any manual editing.
Step-by-Step Guide to Remove Background Using Remove.bg
- Go to Remove.bg: Open your web browser and visit www.remove.bg.
- Upload Your Image: Click the “Upload Image” button and select the picture you want to edit.
- Automatic Background Removal: The tool will instantly detect and remove the background.
- Download the Transparent Image: Click “Download” to save the image as a PNG file (PNG supports transparency).
- Insert Image into Google Slides: Open your slide deck, click “Insert” > “Image”, and upload your new transparent image.
Why Use Remove.bg?
- Fully automatic background removal in seconds
- Free for standard-size downloads
- No complex editing required
Using PhotoRoom
PhotoRoom is another AI-powered tool that removes backgrounds while allowing users to fine-tune the results. It’s useful if you need more control over what gets removed or kept in the image.
Step-by-Step Guide to Remove Background Using PhotoRoom
- Go to PhotoRoom: Visit www.photoroom.com in your browser.
- Upload Your Image: Click “Start from Photo” and upload the image you want to edit.
- AI Background Removal: PhotoRoom will automatically remove the background.
- Manual Adjustments (Optional): If needed, use the Eraser Tool to refine edges or restore specific areas.
- Download the Image: Save your edited image as a transparent PNG.
- Upload to Google Slides: Insert the image into Google Slides to use it without a background.
Why Use PhotoRoom?
- Offers manual editing options for better control
- Supports batch background removal
- Provides ready-made templates for presentations
When to Use Image Transparency in Google Slides?
- To create a subtle background image without distracting from the text.
- To overlay text on an image while keeping it readable.
- To blend multiple images seamlessly into a single slide design.
- To improve the overall aesthetics of the presentation.
Applying Transparent Backgrounds to Multiple Images
When working with multiple images in Google Slides, applying transparency individually can be time-consuming. A more efficient way is to group images and adjust transparency for all at once. This method ensures uniform transparency across images and keeps your slides visually consistent.
Grouping Method (Adjust Transparency for Multiple Images at Once)
Google Slides allows you to group multiple images so they can be edited together, including applying transparency settings in one step.
Step-by-Step Guide to Adjust Transparency for Multiple Images
Step 1: Select Multiple Images
- Open your Google Slides presentation.
- Hold down the Shift key on your keyboard.
- Click on each image you want to apply transparency to.
Step 2: Group the Images
- Once all images are selected, right-click on any of the selected images.
- Choose “Group” from the menu.
- The images will now act as a single object, allowing you to edit them together.
Step 3: Adjust Transparency for the Grouped Images
- With the group selected, go to the Format Options panel.
- Click on “Adjustments” in the right-side menu.
- Locate the Transparency slider.
- Drag the slider to increase or decrease transparency for all selected images simultaneously.
Ungrouping (If Needed)
If you need to edit images individually after applying transparency:
- Right-click on the grouped images.
- Select “Ungroup” from the menu.
- The images will now be separate again, allowing for individual edits.
Tips for Effective Use of Transparent Backgrounds
Using transparent backgrounds in Google Slides can enhance visual appeal and improve slide clarity. However, to ensure your design remains professional and effective, it's important to follow best practices.
Below are some key tips to make the most of transparent images in your presentations.
Ensure That Text Remains Legible Over Transparent Images
- When placing text over transparent images, make sure there is enough contrast for readability.
- Use bold fonts, shadows, or colored overlays to improve visibility.
- If the background is too busy, consider reducing transparency further or adding a semi-transparent shape behind the text.
Example: If using a transparent city skyline as a background, place a light-colored overlay behind the text to maintain contrast and readability.
Use High-Resolution Images to Maintain Quality
- Low-quality images with transparency can appear pixelated or blurry, especially when resized.
- Use high-resolution PNG images for the best results, as the PNG format supports transparency without losing quality.
- Avoid stretching small images to prevent distortion.
Example: A high-resolution logo with a transparent background will appear sharp and professional, while a low-quality version may look pixelated.
Be Consistent with Transparency Levels to Achieve a Cohesive Design
- Stick to consistent transparency settings throughout your slides to maintain a polished and uniform look.
- Avoid overusing different transparency levels, as it can make slides look disorganized or cluttered.
- Consider setting a default transparency range (e.g., 30%-50%) for backgrounds across all slides.
Example: If using transparent images in multiple slides, maintain a uniform transparency level (e.g., all background images set at 40%) to ensure a professional flow.
Conclusion
Making a background transparent in Google Slides is a simple yet effective way to enhance your presentation’s design and readability. Whether you’re adjusting image transparency directly in Google Slides or using external tools like Remove.bg or PhotoRoom, this technique helps create clean, professional, and visually engaging slides. By ensuring text remains legible, using high-quality images, and maintaining consistent transparency levels, you can achieve a polished and cohesive look. Mastering these methods will allow you to design more impactful presentations that capture attention and improve communication.
FAQs About How to Make a Background Transparent in Google Slides
How do I make an image background transparent in Google Slides?
- Insert the image (Insert > Image).
- Select it and open "Format Options" > "Adjustments".
- Drag the "Transparency" slider to adjust.
- Fine-tune brightness and contrast if needed.
How do I remove the white background from Google Slides?
Google Slides lacks a background removal tool, so:
- Use Remove.bg or PhotoRoom to remove the white background.
- Download as PNG (supports transparency).
- Upload to Google Slides (Insert > Image).
How do I make an image background transparent?
- In Google Slides: Format Options > Adjustments > Transparency Slider.
- Using Online Tools: Remove background with Remove.bg or Fotor.
- In Photoshop: Use "Remove Background" and save as PNG.
How do I make a background disappear in Google Slides?
- For an image: Adjust transparency in Format Options > Adjustments.
- For a slide background: Slide > Change Background and choose a solid or transparent option.
- For objects covering the background: Right-click and select "Send to Back" or delete them.


